A blog intended for, and often written by, my middle school students, as well as anyone interested in the fascinating potential of 3D printing and the process of getting there. Since our blog's start in 2013, we've expanded our content a bit to incorporate our other middle school making. Click the "Our BPC Story" blog label to learn more about our Maker Club journey.
A new 3D printing company, Sculptify is taking the next 3D printing leap replaces traditional (and expensive) plastic filament with pellets. These ingenious pellets would significantly reduce the cost of home 3D printing. (According to Sculptify, a 2-pound bag of pellet costs around $18, while a 2.2-pound spool costs roughly $48.)
Sculptify is not the first manufacture to use pellets, German manufacturing company ARBURG has an industrial 3D printer, the Freeformer, however Sculptify is the first hobbyist-level pellet based 3D printer. Here is Sculptify's Kickstarter video.
The process works by having the plastic pellets go into a turning screw, then go down the screw while being heated, turning it into one tube of semi-molten plastic. Sounds familiar, right?
There have been other companies toying with the idea of using pellets for 3D printing, including a couple of products that promise to turn your pellets INTO filament. Products like the Filabot (2012), Filastruder (2013), and Strooder (2014). Other companies, like Colorfabb, are beginning to offer plastic in its less expensive pellet form.
I recently had the chance to visit and tour Formlabs, where I saw firsthand some of their early prototypes and new 3D printers.
The Form 1 and Form 1+ are great 3D printers. The Form 1+ is the new version of the Form 1. It comes with many improvements, such as faster print time and more accuracy. They are both SLA (Stereolithography) printers.
The Form 1 and Form 1+ use a galvanometer system (two mirrors) to focus and direct the laser. Then the laser gets reflected off a mirror to the build plate. The laser fuses the resin together.
After each layer is printed, a motor moves the build platform up. Unlike fused deposition modeling, the Form 1 and Form 1+ have the build plate on the top instead of the bottom.
The Form 1 and Form 1+ offer significant improvements over FDM printers. When each layer is created, the way the material is bonded together ensures there will be no layer lines, making the print look significantly better. They also offer much better resolution than any other consumer 3D printer. The layer height can be from 25 to 100 microns. 100 microns is what most desktop 3D printers offer right now. The Form 1+ is up to 50% faster than the Form 1. The Form 1+ is more expensive than most consumer 3D printers, costing $3,299, but the print quality makes it worth the price for those seeking extremely detailed products. The Form 1 and Form 1+ also require post processing that can take an extra 22 minutes using isopropyl alcohol (which should not be handled by kids). The Form 1+ has the best resolution and print quality of any current consumer 3D printer.
While at Formlabs, I had the chance to see many examples of models they had printed out with the Form 1+ and Form 1. Among my favorites are a rook and an action figure with a 3D printed head. This action figure's head was scanned and then 3D printed. This rook is Formlabs' new take on the rook that comes with most 3D printers. Instead of bricks stacking up, it has a beautiful spiral and a very intricate staircase.
US Government agencies such as NASA, The Smithsonian, and the NIH have started to create their own collections of 3D objects!
NASA's model collection is mostly contains models of their satellites however it also contains some of things like space suites, shuttles, and a martian crater. Unfortunately, most of these models are not printable. NASA has conveniently separated the printable models on this page.
The Smithsonian museum has also started uploading 3D models of items from their collection to their Smithonian X3D website. Though many of these models look amazing many also look unprintable so be warned before you try to print them.
The NIH has taken a different approach to 3D model collection by making a Thingiverse like website for medically accurate 3D models. As you might expect, many of these 3D models of proteins and cells are scientifically accurate but likely un-printable. (Especially on our classroom 3D printers.)
NIH
UPDATE 7/4/15: There are more model repositories that have been brought to our attention. Here is a running list:
Check out this video of Chuck Hull, winner of the European Inventor Award 2014. (You can view videos of the other winners here.) In this video, he describes his invention of the first SLA 3D printer in 1983!
As part of their summer "Hellmann's Summer Hacks" campaign, Hellmann’s (yes, the mayonnaise company) released a video of it's 3D mayonnaise printer. The printer is delta style (see image on right) and resides in a food truck.
The blogosphere is calling it a "mayo selfie" however it doesn't seem to strictly adhere to the requirement that you... umm... take the picture yourself?
The "BBQ lab" takes your picture, uses some software, and then prints your face on your hamburger. In my cynicism, I might also argue that it is not necessarily 3D printing, since there is only one layer. It's more like a giant mayo Sketchy.
Although this certainly sounds like something the Bay Area would be into (though, do people eat mayo out here?), the promotion is currently being marketed in the United Kingdom.
You can watch the video below, or read this post about it. Apparently, Hellmann's is not the first, nor will it be the last, company to jump on trendy 3D printing - Oreo has it's own 3D printing capabilities at SXSW earlier this year.
Anyway, last year we noticed that visitors to the ALS had the option of building their own model of the building:
Build your own ALS by constructing a papercraft version of the ALS. The 3-D model of the ALS can be made quickly with only Scotch tape and scissors, and when completed, the top tilts off to reveal the beamlines and accelerator under the dome. The model and instructions can be downloaded here; heavier paper (i.e., #80 or #100 paper) is needed to print pages 3-6 (the actual building parts).
While the BPC Maker Club certainly appreciates the power of tape, cardboard and duct tape, we also love 3D printing! We wondered if any other light source had a 3D model. We found one, based on the Diamond Light Source near Oxford in the UK. It is pictured below and the stl file can be downloaded here.
But that wasn't enough for us. So, recently-graduated BPC alumnus Cole C took on the challenge of creating a 3D model of the ALS. (It's worth checking out his other designs on Thingiverse, too!) You can download the most recent file here.
v.1 pictured - download links to v.2
You should feel free to download your own synchrotron model! :)
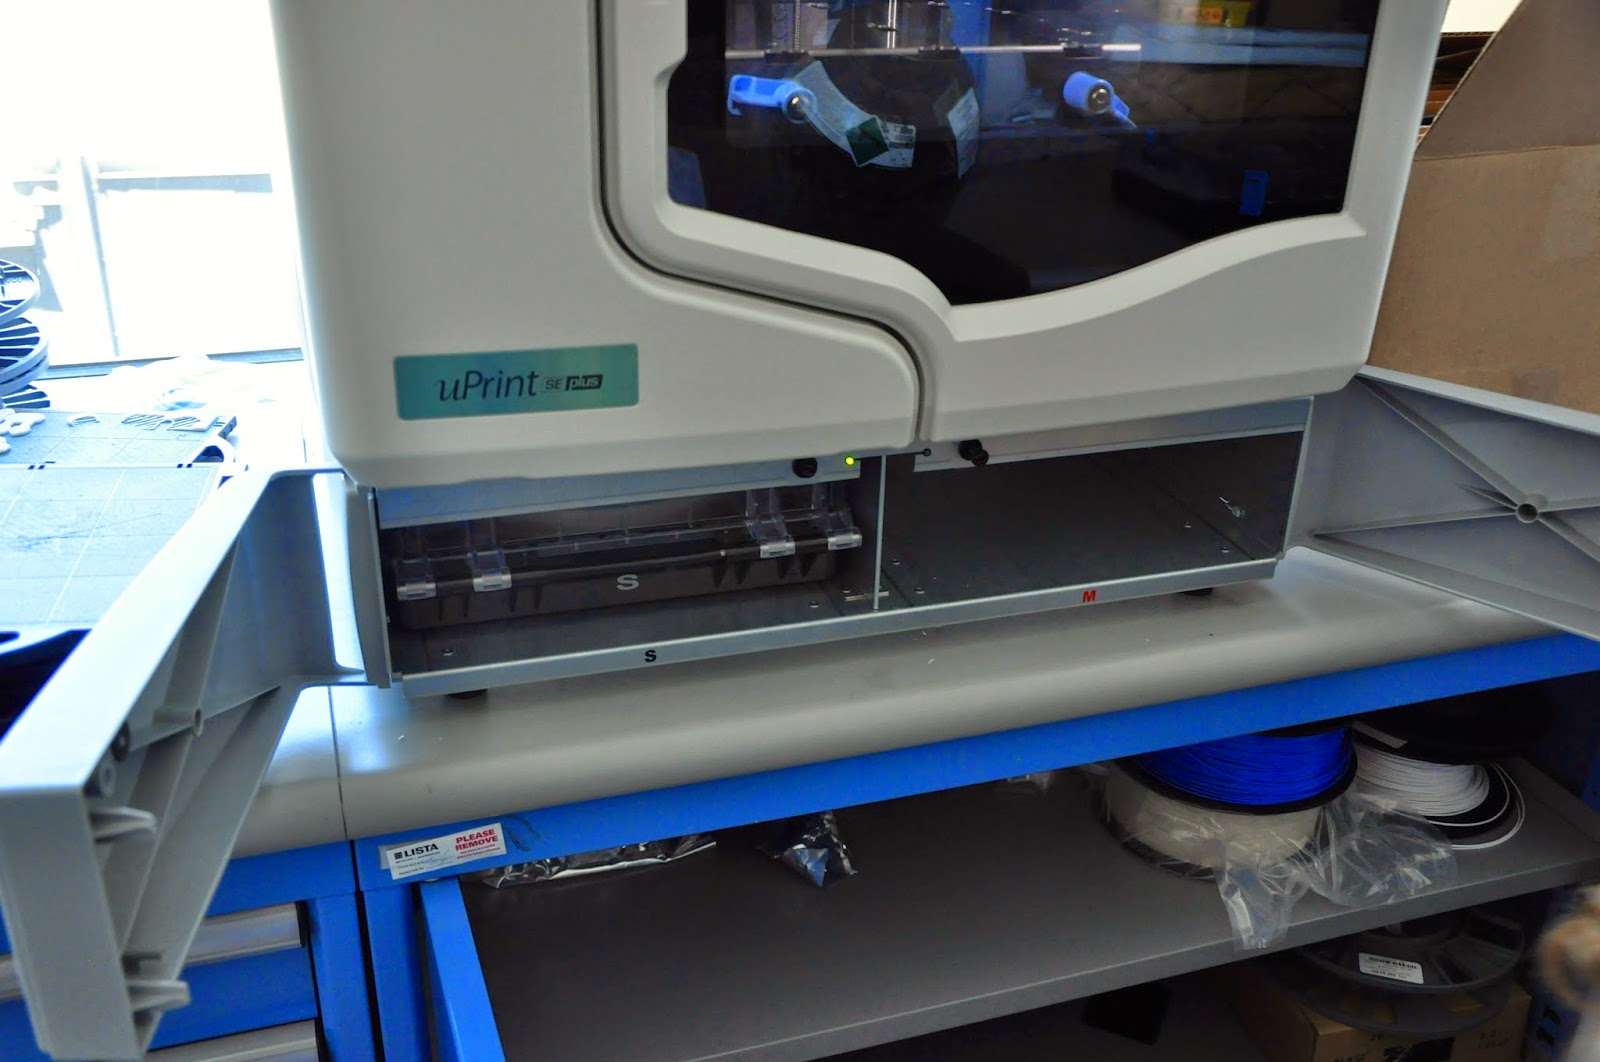
This summer, I have the pleasure of working as an educational consultant at the Advanced Light Source, basically working to expand the cool experience my students had in order to bring a similar experience to more classrooms. One of the "perks" of such an assignment is having access to higher-end tools, including a Stratasys uPrint SE Plus system.
My first few days there, I was asked to familiarize myself with its workflow. It is refreshingly simple and very similar to working with my consumer-level printers (minus the mechanical issues of filament tangling, print not sticking to bed, etc). It is actually quite incredible in its simplicity and reliability.
The first item I chose to print was a model of a Taung Child Skull, featured in a recent Radiolab podcast and available on Thingiverse. Radiolab worked with MakerBot and the Field Museum in Chicago to scan the original skull.
This is is just one of the many exciting models to be made freely available through the increasingly availability of scanner and consumer 3D printers. In fact, you may want to check out the Smithsonian's entire X 3D collection!
The Taung Skull (named such because it was discovered in 1924 in Taung, South Africa) is a fossilized skull of a young member of the Australopithecus africanus species, in intermediate between apes and humans, and considered the first evidence of bipedal walking. It is thought to be about 2.8 million years old. The Taung Child was originally thought to be about six years old, but more recent investigations place the age more likely at 3 or 4 years. It has been hypothesized that the child was killed by a large predatory bird based on scratches in the eye sockets.
I am looking forward to sharing both the story and the model with my students.
Here is the uPrint. Perhaps my favorite feature is the auto-shutoff. After you start a print, you can instruct it to power down at its completion. Quite helpful when you are printing 24+ hours!
The software is very intuitive. And you can easily add STLs to the "pack," printing multiple files at once. There is also the ability to auto-orient, which is nice. The support material, like most machines, is auto-generated.
You can see from the image below that this was a 16 hour print.
click to enlarge
The printer itself is highly independent. It reminds me of a washing machine! One aspect I found interesting is that whenever it switches between support and material (it's PLA) and printed material (it's ABS) the nozzle returns to the back left corner, scraping over a steel brush to (I presume) clean itself.
Here is the final print out of the machine:
Next, the print needs to go into the chemical bath to dissolve away the support material. Though the exact material is proprietary, it is likely some sort of caustic soda (sodium hydroxide). Whatever it is, it is quite basic, kept at 70 degrees Celsius, and is agitated. To put this in time perspective, this print was in the dissolving bath for 7 hours!
Final Skull Print
There are a couple of interesting differences between this prosumer machine and the one we have in our classroom. The filament basically loads and unloads itself. There is a pretty intense cartridge and included RFID tag that tracks everything (lower right).
And finally, the printing actually takes place on these disposable plastic print beds. Apparently, you are supposed to use a fresh one for each print. I am curious if this is absolutely necessary or a nice revenue generator...
Maintaining this machine is not cheap. Our 1 kg filament rolls cost about $35 - $45. The uPrint's 1 kg rolls go for about $200 a piece!
Moving forward, I will be using the uPrint to print tomographic data sets, like our eggshell or this grapevine - so cool!
Dula Parkinson, Beamline Scientist, for patiently mentoring me during my IISME summer 2013 internship and having the vision to design and implement our November 2013 ALS experience, as well as his continued support through the data analysis / printing process.
Howard Padmore, BPC parent and ALS Division Deputy for Experimental Systems Group, for his role in organizing the 7th grade trip, as well as his encouragement to apply to the White House Maker Faire.
Justin Blair, scientist, for his help with data visualization and his 3D printer assistance.
The Maker Club (again) for a very successful debut at the San Mateo Maker Faire in May 2014, especially to those 7th graders (Flynn, Abe, Alexander, Jane, Daniel, Sam, Kyra and Emily) who volunteered their time at our booth. Also, Gigi, Alex, and Luka (all 6th grade) and Isaac (8th grade) for their help.
Finally, those BPC students who spent long, sometimes frustrating hours with our initial 3D printer back in 2010, which was far more finicky that our current machines: especially Adam (BPC Class of 2013) and Cole, Noah and Daniel (BPC Class of 2014)
I am sure we are leaving folks off this list, but the point is that the kids (and their teacher!) did not accomplish this on their own and we are grateful for the opportunities for collaboration we have experienced along the way.
White House Maker Faire as a Concept
As for the White House Maker Faire itself, It was fabulous to see so many inspiring people in one room. Dean Kamen, Super Awesome Sylvia, Will.i.am, the guys from Open ROV, and Caine from Caine's Arcade! And of course, an honor to hear the President speak!
The excitement began exactly one week before the Maker Faire. We received the email (below) 6 days prior to the event with scant details beyond we were invited and the event would occur sometime on Wednesday, June 18th. In addition, we were asked not to discuss our participation until the morning of the event. I've since learned this is how things roll with White House Events.
I was thrilled to be invited, but was surprised (OK, not really) that I could bring only one student from our collaborative team. Luckily, due to a last minute cancellation, we were able to bring a second student! Though many students contributed to this day (as discussed in the acknowledgments above), Sam and Jane have worked tirelessly to develop the project and share what we've learned with a broader community, so it was pretty clear that they would be selected as our representatives.
Two days before the Faire, we received clarification that as "honored makers" we were able to attend the event, but we would not be presenting our project. Well, that certainly made packing easier!
The connections began from the minute we stepped in line for the event. One of the first people we saw was Avi Reichental, President and Chief Executive Officer of 3D Systems. The kids introduced themselves, thanked him for our Cube printer, and shared our project. We also met the CEO of Trimble, the company that purchased Google SketchUp.
There were many steps through security to enter the event. My personal favorite was the portable where we each had to walk through and be sniffed by working dogs!
Once inside, we were thrilled to see local makers David Lang (Zero to Maker (Love this book!); Open ROV) and Eric Stackpole (Open ROV). These gentlemen have been generous in letting our Maker Club come and visit their space in Berkeley. We also excited for BPC to team up with these guys and host a screening of maker: A documentary of the maker movement at our school in the fall of 2014!
Soon after, we bumped into Caine, of Caine's Arcade, who inspired our very own cardboard arcade at BPC in which we combined old school materials (cardboard and duct tape) with some newer technology (MaKey MaKey and Scratch). It was cool to see so many kids at the Maker Faire. We also chatted briefly with both "Super Awesome" Sylvia and Shubham Banarjee, creator of the "Braigo," a Lego Braille printer.
If you have never seen the video Caine's Arcade , please take 10 minutes and watch it now.
There were about 30 makers set up throughout the White House's east wing. Some of our favorites included MaKey MaKey, Squishy Circuits, the crowd-pleasing Robotic Giraffe, and LittleBits.
We spent a lot of time at the 3D Systems booth. One of my favorite moments was when I turned around to see Sam chatting with Will.i.am about our project. (Will.i.am was recently appointed Chief Creative Officer for 3D Systems. He actually does all sorts of impressive philanthropic work.) The best part is that Sam did not recognize him as a famous musician, while I was trying to get past "OMG - Will.i.am is checking out our 3D printed Mentos shell!)
Finally, we spent some time talking scanning with Joshua from 3D Systems about scanning.
We also were able to visit with Other Mill, who we first met at the San Mateo maker faire and learned this week is based out of San Francisco!
Of course, a major highlight of the day was being able to hear President Obama speak. We were pretty close (this is a picture taken from our seats!) Fun fact: Obama is the first president to be scanned and 3D printed!
Other Makers
Here are some of my favorite makers and their projects, as described on the official attendee list.
Hannah Chung and Aaron Horowitz created Jerry the Bear, a best friend for kids with type 1 diabetes that helps them master their medical procedures through play.
After hearing President Barack Obama’s State of the Union address on February 12, 2013, French artist and designer Gilles Azzaro was inspired to create a 3D-printed art piece based on the President’s message about the importance of additive manufacturing and his call to action to create a network of National Manufacturing Innovation Institutes. Azzaro developed his own program to transform the audio recording of the State of the Union address into a format that could be 3D printed. The 3D printed portion of the art piece took a total of 350 hours to build. The result is an artful and tangible rendering that synchronizes the audio of the speech with a laser that travels across the sculpture.
Miguel Valenzuela, who is originally from California but now lives in Norway, was asked by his two young daughters to create a pancake machine out of LEGOs—a request he just couldn’t turn down. When Miguel and his family debuted the invention at the 2012 World Maker Faire in New York City, it instantly became a crowd favorite. Over the last couple of years, Miguel has continued to improve the design and functionality of the PancakeBot, releasing the newest version earlier this year.
Another fantastic maker (not pictured) was Hahna Alexander from Pittsburgh, PA.
Hahna is the co-founder and CTO of SolePower, an innovative company known for a shoe insole that charges portable electronics by walking. The device branded “EnSole” works by generating power in the heel with each step and storing power in a Power Pack holstered on the shoelaces. The Power Pack can be removed at any time to charge a phone or any other electronic device using a USB port. SolePower’s 3-year project has won the team the 2014 Popular Science Invention of the Year award as well as the Africa Energy Award for Innovator of the Year. The SolePower team looks forward to bringing easy-access energy to shoes all over the world, one step at a time.
After the Faire
While we were in DC, we had the opportunity to tour a few other places. A former student of a parent of my current student (got that?) had an internship and was able to swing a partial tour of the West Wing.
Outside the West Wing!
Finally, on Thursday just hours before our flight took off, we toured the National Defense University and learned about this fascinating learning institution which "supports the joint warfighter by providing rigorous Joint Professional Military Education to members of the U.S. Armed Forces and select others in order to develop leaders that have the ability to operate and creatively think in an unpredictable and complex world." (quote from their mission statement) Someone described it as "social defense" or the capital of people. Countries send their up and coming military leaders to study together.
One unexpected highlight of the trip was a meet and greet with NDU president Major General Gregg F. Martin, who invited us to listen in on a briefing on the current state of Iraq. He further surprised us by saying, as we walked in the door, "why don't you kids get us started by summarizing your project in one minute to these folks?" A formidable challenge to be sure in a room full of adults, many in military uniform! But Sam & Jane did us proud! :)
White House Maker Faire Media
It's been interesting to read other people's experiences at the White House Maker Faire. Here are some blog posts by folks from The Grommet, La Petite Maison, more? Also some articles discussing the focus on 3D printing.
Here's our media roundup re: our White House Maker Faire experience:
Well, this is exciting. Earlier this spring, Sam blogged about his "3D Printing Test" at the San Mateo Maker Faire. Armed with a flashdrive containing an STL of our eggshell scan, he and his comrades visited a number of 3D printing companies, and persuaded them to do prints for comparison.
While Formlabs admits they are not in the K - 12 educational space yet, they were excited about what our kids were doing. (You can see Sam fits right in with the Formlabs staff in his ever-present orange shirt.)
Well, Formlabs apparently enjoyed the post and wrote that they "think your post is really great, and wanted to feature it on our own blog." We were, as you might imagine, very happy to agree!


.JPG)