Showing posts with label Design Tips. Show all posts

Sunday, June 4, 2017

Screen Printing for Awareness

I Screen Printed onto old shirts to raise awareness for the LGBTQ+ and mental illness communities. I noticed that representation in the media of the LGBTQ+ community is sparse, and there is almost no representation of people who fight with mental illnesses. Seeing yourself represented in the media can change someone's outlook, make them feel hopeful, and can show them that they are not alone. Lack of representation can isolate groups of people and I wanted to combat this problem with creativity. At first I wanted to make a clothing line, however time and material constraints proved that to be unfeasible so I decided to try screen printing. I had never screen printed before, so I had to learn from Wikihow. I started out by coming up with phrases to ink onto the shirts, for instance “Dear Homophobes; Boo!”. DSC08469.jpg
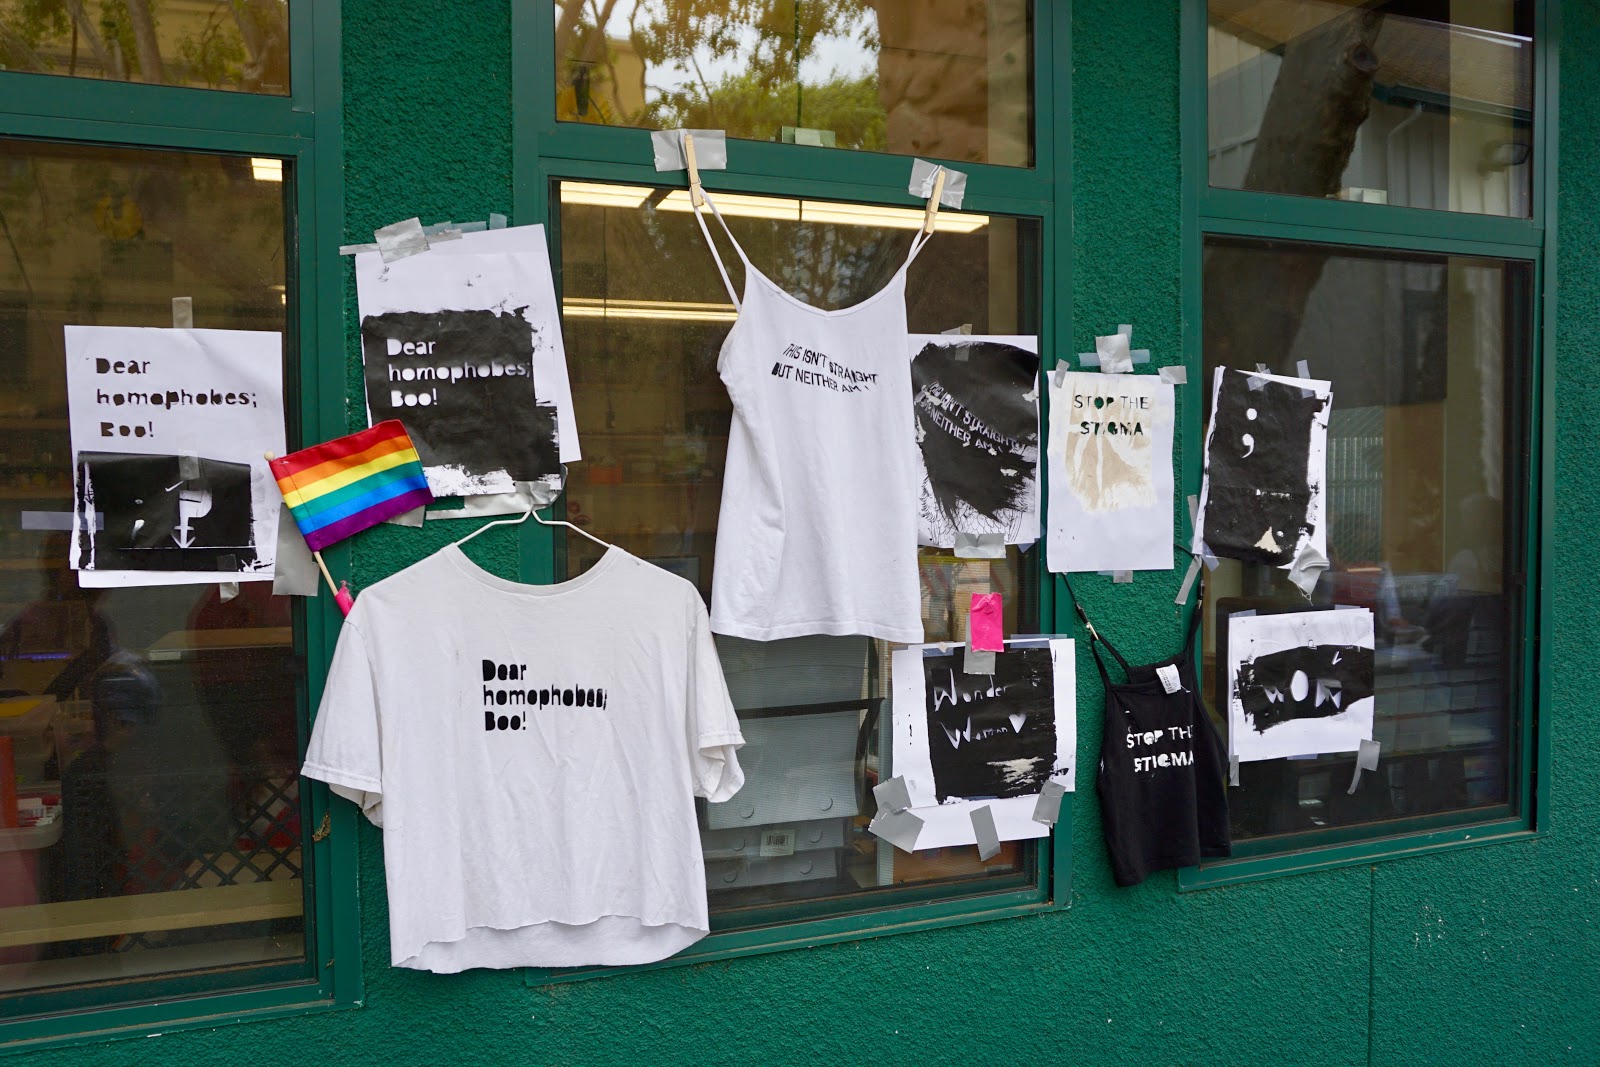
(Image from the school Maker Faire taken by Ms.Mytko)

DSC08341.JPG
I tried cutting out the phrases, however this was challenging to do with scissors. I decided to try printing it out first, then using an exacto knife to trace the lines. This worked well but it still wasn't time efficient. I finally attempted to laser cut my design, this was not only time efficient but it was also a great learning experience. I cut old undershirts and screen printed my phrases onto them. This project costs around 45 dollars for the baseline materials but it can fluctuate significantly for the unnecessary materials.

I learned that it's okay for there to be small mistakes and sometimes those mistakes can improve the style of the shirt. I would enjoy marketing this into a business on Etsy, I will continue to screen print at home and I will possibly sell some shirts. If you are interested in this project make sure you set the ink into the shirt before you take off the screen, this will ensure better quality prints. Don’t give up when the ink smears, or doesn't come off, you can always go over your design with an ink dipped pencil. If you don't focus  on the mistakes, but rather on the quality parts of your print, you will end up a lot happier!


This is the Wikihow site that was incredibly helpful in teaching me how to screen print: http://www.wikihow.com/Make-a-Screen-Print#With_an_Embroidery_Hoop_sub

Sunday, December 15, 2013

Top 10 Tips for 3D Printing Design from the MAKE Stage

Kacie Hultgren, more commonly known as "PrettySmallThings" on Thingiverse, gave this helpful talk at Maker Faire NYC 2013.  While the video below does not show the slides which correspond to her talk, Hultgren kindly provided a link to the presentation on Slideshare.  (If you are interested, Hultgren also has a bunch of 123D Design tutorials on YouTube that you might want to check out, or you can read this MAKE magazine interview with Hultgren.)  


Here are the "Cliff Notes" of her top 10 (fused filament fabrication) rules for designing for print that she "learned the hard way, on [her] own, and from ... culling through the Thingiverse universe and trying to learn from other designers."  Scroll down to watch the presentation or view the slides.

1.  The 45 degree rule - "[FFF] printers do not print with dissolvable support material, so whenever possible," you want to avoid support material.  (Overhangs that are greater than 45 degrees will need support material.)  So keep your layers within that 45 degree or cut up the design and print the cut parts as self-supporting, then assemble.  (see Plated Okapi below)
2. Add custom support material - don't rely on the computer algorithm  - "be smarter than the computer" and design your own. 
3. Ditch the raft - Rafts are "good for beginners" (like us!) since it helps with adhesion and helps level out the build surface if the build plate is not quite level.  But it adds print time.  If you have ditched the computer-generated support material, why not ditch the raft?  Add "mouse ears" or helper disks instead (shout out to TinkerCAD) 
4. Know your details - "double your thread width + fudge factor" = what is the smallest feature you can design?  You need to know the limits of your machine.

5. Design in fit tolerance -  She says this is tough.  She recommends making a test print with many different diameters to see what fits in, so that you can design in the correct measurements.
6. Use shells properly - shells are "copies of the perimeters" or the walls. Two shells is good for most prints, unless you think your design will need to withstand a lot of stress.  Be careful not to use too many shells in a delicate areas, as this may prevent any kind of fill.
7. Optimize walls for thread width -  Take advantage of your thread widths to optimize print time for thin walls.  
8. Orient for best resolution -  Resolution only refers to z-height.  Thread width (generally) does not change - either .4 or .5 mm (measurement of the nozzle).  "It is always going to be the same width, no matter how thin you can make it."  So orientation matters!
9. Orient for stress -  Prints can break along layer layer lines, particularly with ABS.  So again, orientation matters!
10. Tackle print in place - "pull the element designs to the build platform," build out at 45 degrees, "use bridges for captive parts" and "gap print carefully" (<< this #10 tip I'll need to investigate more, since I don't fully understand what she is talking about) - Check out the thought process in orienting this print, Umbrella.

Earlier in the talk, Hultgren interestingly comments on iteration saying that tries to "prevent iterations" (9:53) "We always say it is good to iterate on a 3D printer - it's even better if you can get it right the second time, or maybe the third time, instead of the tenth time."  In the Q & A, she gives this advice: "I used to sort of create a design and then test it until it worked.  And now, I keep all of this in mind before I start and I do as much testing upfront as I can, so that once I send it to printer I am pretty confident that it's going to go ahead and print."

Of course, after I wrote this post, I realize that MAKE Magazine wrote a very nice blog post on this presentation already, you if you haven't seen it already, you may want to check it out.