Showing posts with label Hardware and Materials. Show all posts

Tuesday, May 14, 2019

Tales of Many 3D printers #tbt

[post under construction]

Is there such a thing as too many 3D printers?  I contemplated this over the weekend, as Facebook "memories' reminded me that I purchased my Makerbot Replicator 1 exactly three years ago. Looking around my classroom, I realized I have owned 10 3D printers. So, on this anniversary of sorts, I present: Where are they now?

1 Original Printer bot

[pic of printer in bin]

2. maker bot rep 1

3. Cube
Our first Cube performed great until a problem forced us to replace it. The replacement also worked well, at least until it caught fire.

4. Printerbot (donated to BHS)

5. Printerbot simple metal
Gifted by Printerbot before maker fair 2014, the kids abandoned it, and it now resides Sam.

6. Droplit
We got this as a kit that some Maker Club kids assembled. Unfortunately, the kids that put it together forgot to document the process, and it now sits in a corner. We plan to start repairs after Maker Faire, but until then, it will remain in it's corner, starring down on those who abandoned it.

7. Afinia
The Afinia is the most reliable printer we have used to date. The print quality good, but the rafts are hard to get off. It currently is suffering from a clogged extruder, and will be fixed soon.

8. maker bot rep 1
We got this one for 90$ at a maker clearance event brand new. It worked fine for a while, but there is currently

9. maker bot rep 1
This was also from the clearance event, and was also brand new.

10. Buko bot
We the Bukobot got to act as a more "kid friendly" printer (also because it could print upside down), but there is something wrong, and cannot move on the z axis, and will make grinding noises if attempted.


Others (add to the list)
2 Cetus
1 bioprinter (school purchase)
3 Ultimakers (school purchase)


Newest:
Prusa mini (back-ordered)

Sunday, November 5, 2017

The Forgotten Dream: Our Glowforge Arrives! (PART 1)

Back in October 2015, we pre-ordered the Glowforge. We, and other Glowforge potential owners repeatedly received delay-of-shipment emails, to the point where many people began to jump ship.

The space had been taped off for so long and it had become a joke. Someone wrote "The forgotten dream," back in 2016, and earlier this year, someone else added "We will love love u and cherish u what scared u away?" We still don't know who wrote these messages.


And then, we received "the" email.

Thursday, October 19th


On Friday, November 3, the box arrived. (Teacher's note: Friday was parent-teacher conferences, so there weren't any kids to freak out with. I sent them an email, but it wasn't quite the same.")


Sunday, November 5, we assembled for the unboxing.

We made the same mistake we make every time we open a box with something expensive in it: we cut the tape and then realized we had opened it wrong. We carefully turned it on its side and took the laser cutter out. Looking at the unboxing guide, with the link conveniently located inside the box, we found that we shouldn't have even cut that tape.

Once we got everything out of the box, we removed the protective foam and assembled the "print head."

We cut out some cardboard to seal the window we were venting the exhaust through, and set up a table near the window. Then we plugged it in and turned on the machine. It worked as expected, making some bubbling noises from the water-cooling system. The setup process was super simple and only required us to connect it to the school's WiFi before we could start making things from their web based software (that can run on a Chromebook!).


Someone drew a simple not-so-accurate square on a piece of paper and placed it in the machine so that we could scan it. We scanned it and then put some acrylic in the machine. When we went to cut, we ran into a problem.

Here's the thing: the Glowforge was so popular because of how easy it is to use. In order to make it this simple, they made their own material presets. These material presets are only for their "proofgrade materials," which means we can't cut with our own materials. They do have a way that you can set it yourself, but the controls are very ambiguous and you can't save presets. We also didn't have our introductory proofgrade material kit, it came the day after.

So, we estimated, choose only to engrave, and ended up with this >>>


Friday, May 26, 2017

3D Printed Gears Using Dual Extrusion


For our school maker project (in science class), we wanted to create something that kids everywhere would be interested in using, and we also brainstormed different ways to spread our creations beyond the school to reach a wider audience.  We wanted to use our knowledge of 3D printing.  As we saw the rise of fidget products all over our school and all over the country, we realized that we had found our project: we decided to 3D print some fidget spinners that we designed ourselves out of recyclable filament.  There were some technical challenges that we experienced: for instance, the design we created ended up with some overhangs, which you can see in the image above.  To deal with this, we decided to use dissolvable support material to hold them up. We also had to make a decision about what printer to use of the ones available to us at school.  We chose to use a Replicator 1st Gen because of its dual extrusion capabilities, and this served us pretty well.

At first we were just making very colorful objects with two different colors of filament. We made this two color frog, along with some other things. After making a few multi-color prints, we quickly realized that this printer wasn't made just for printing with different colors. There must be some other reason that they made a dual extrusion printer. After doing some research, we found out about dissolvable filament. With dissolvable filament we would be able to make very complicated prints and dissolve the support material in limonene. One of the biggest problems with 3D printing is that you can't get support material out of very small places. With dissolvable filament, it was also possible to make moving parts in one print. Our first test was to make this gear thingy. We then decided we wanted to make more, and designed a different two geared fidget. However, we had a problem, the sides were not fully connected and the model often broke. We redesigned it, and it look something like this:


2.0 coming out of a tub of water after getting soaked in Lemonine

We used TinkerCAD because of its very straightforward design software that all of our group members knew how to use and the fact that we could use geometric shapes very easily along with the community shape generators.

To get started with our project, we started out with a simple dual geared fidget because we had no experience making this type of project before. Starting simple was helpful, and we later were able to get more complicated and make things like triple gears and quad gears.

One of our greatest challenges was when one part of the 3D printer we were using broke. We were able to re-3D print this part but it was a bit of a hold up. We also had to come up with a way to fix the windows for our 3D printer because our print’s kept peeling and we needed to stop drafts from reaching the heated build plate.


Elan fixing The Replicator
Throughout this process we learned not to rely on machines because machine failure is common. We also learned that even if you are using a very baseline software, you can still make amazing creations with it, it just may require more work.

If we wanted to continue this project, we could create more gear designs using ball bearings. This would be hard though because we might have to not print the gears as one piece so we could insert them, or we would have to put them in mid print.

Our advice for other people who do this project is to start early and use a web based software (like tinkercad.com) so that they will be able to access and change their project from different places.

An estimated cost of materials in this project (not including the 3D printer) is about $40 because of the fact that the slicer and the design program (Tinkercad) were both free, so the only costs we had to cover were filament (ABS and HIPS) and electricity. This $40 could cover many, many gears, because they are almost hollow and therefore very efficient with the material.

Rolls of ABS and HIPS

To learn more about dissolvable filament check out this on MakerBot’s website.

One day while we were waiting for a set of gears to print we chose to make a website at www.thegearmakers.wixsite.com/gearmakers. Through our project we had to fix the Replicator about six times and replace some parts. By the end we had created four production lines. And already finished two of them (dual geared basic and dual geared +). We thought that with four different products to choose from we had finally done what we had meant to the whole time, we had finished with our fidget production.

Monday, March 20, 2017

THE AMAZING BUDGET CETUS 3D

Today we got a package and are proud to introduce to you, the Cetus 3D! The Cetus is a printer from Teirtime (the same parent company of Afinia).


The Cetus is a pretty new 3D printer that was on Kickstarter for pre-order late last year and was meant to deliver this January. We bought this directly from Cetus and it came in about 2 weeks from China. As you can see, it does require some assembly, but it is not too bad.


The Cetus seems like an amazing deal for $300. It removes all of the flashy boxes and accessories most of the new 3d printers have today, and gives you a great experience. With linear guide rails, a 7 inch cubed build area, wifi printing ability, and an easy to use software, it even came with a nozzle unclogger and snippers to cut filament and such, what's not to love? Well, not much.

The only bad thing is the Z axis is not supported without power. This means when you turn off the printer when it is at the top (or its idling position) the printer head will glide down and rest into the build plate. You can print a clip or lever to hold it in place and stop it from doing that so its an easy fix.

From the first test print, we can see it is super super great quality for a budget 3D printer. I do have to say that the next time anyone asks me for a suggestion on a nice, budget 3D printer, the Cetus is going to be the first thing I suggest. Its great for a classroom or your first 3D printer.


I was also surprised when I printed an overhang stress test and it didn't start stringing until about 60˚, and even after that it still printed with very very minimal strings (even to 90 degrees!!).

I was amazed, I then loaded up the Make Benchy boat stress test. Once again I was astonished at the quality of the overhangs and pure detail around every corner. Comparing it to the Afinia, the Cetus lacks a heated bed (and that means no ABS but it doesn't matter anyways because our classroom is trying to move away from ABS) and currently in their shop is a beta heated bed anyways so if you really wanted it you could get it. On the flipside, the Cetus has a much larger bed and is also quite a bit cheaper.

I'm excited to continue using this 3d printer as it is by far my favorite.

- Enzo (8th grade)


Sunday, March 22, 2015

Carbon3D's CLIP - truly a breakthrough in 3D printing!

This is truly remarkable. I first heard the news last week from 3DPi (read their comprehensive article here).  Inspired by the T-1000 from Terminator 2, Dr. Joseph DeSimone and his team have come up with a truly revolutionary idea in 3D printing.  Check out this video (at 7x speed). It's so fast, they printed an object (which would take up to 11 hours using traditional 3D printing methods!) DURING the 10 minute TED talk!


They call it CLIP - Continuous Liquid Interface Production.  And it grows  parts instead of printing them layer by layer!  (more on this later) Take a look at the micrograph (right) - the image on the right is a traditionally 3D printed part with layers, on the left - CLIP!  Plus, CLIP is 25-100 times faster than traditional 3D printing.

Dr. DeSimone, CEO and Co-Founder of Carbon3D, says, “Current 3D printing technology has failed to deliver on its promise to revolutionize manufacturing.  Our CLIP technology offers the game-changing speed, consistent mechanical properties and choice of materials required for complex commercial quality parts.”

So, how does Clip work?

For now, I'm quoting right off their website, and will add as we learn more.

CLIP is a chemical process that carefully balances light and oxygen to eliminate the mechanical steps and the layers. 
It works by projecting light through an oxygen-permeable window into a reservoir of UV curable resin. The build platform lifts continuously as the object is grown.
The heart of the CLIP process is a special window that is transparent to light and permeable to oxygen, much like a contact lens. 
By controlling the oxygen flux through the window, CLIP creates a “dead zone” — a thin layer of uncured resin between the window and the object.** 
This makes it possible to grow without stopping. As a continuous sequence of UV images are projected, the object is drawn from the resin bath. Sophisticated software manages the entire process by controlling the variables. 


** We are very interested in learning more about this "dead zone" - it is tens of microns thick and an area where it is impossible for photopolymerization to occur.

Want to learn more?  Check out the Carbon3D website, another article, or (highly recommended) watch the recently-released TED talk below!


UPDATE 3.26.15:  3DPrint.com has a story about Gizmo 3D, a company that says they too "are working on a super fast SLA style 3D printer, which may actually one-up the Carbon3D system, as far as speed and print quality go."  Read more here!

Just for fun, here is the Terminator 2 video clip shared in the TED talk. (in Spanish...?)


Friday, March 13, 2015

Our New Cube Take #4

Our new cube recently started malfunctioning again. We saw that filament was coming out at 1.52mm instead of something closer to .4mm. Luckily we still had our old Cube that we have yet to return (oops) - that one has a malfunctioning control board. Since the extruder on that old Cube still worked we thought why don't we try to replace our new cube's extruder.

We took this project to our after school 6th grade 3D printing club. Where we started, trying to figure out how to get the extruders off. As it turns out the extruder is only attached by 2 screws that we could easily take off. We took off both extruders 1 from each cube 2 and swapped them to create a FrankenCube. We tested it out and it worked.


Sunday, February 8, 2015

3D Scanning With the Structure Sensor

The Structure Sensor is a versatile 3D scanner with a host of apps and programs that you can use with it. It is made by Occipital, which licensed the technology to 3D Systems as the iSense.  (Read 3DPI's review here.)  The Structure Sensor adds a infrared camera and projector and uses your iPad's camera to sense color. Since the Structure Sensor's SDK is public there are many programs you can use with it some of these programs include Skanect, ItSeez3D, and Structure Sensor's own collection of apps.


A Scan of  My Computer Set Up
1. Skanect: Skanect is a PC and Mac scanning software (by Occipital). It costs $129. Connecting the Structure Sensor to the software is easy, you just connect both to the same wifi network and they automatically connect if you have free app called Structure open. You see a live view of what the Structure Sensor is seeing when you are scanning. I find you can scan larger objects with Skanect than any other Structure Sensor app or program but most 3D models do not have backs which make it hard to 3D print. Skanect also works with the Kinect.


2. ItSeez3D: ItSeez3D is a iPad app that uses the Structure Sensor to capture 3D data. It creates amazing head scans but each scan needs to process in the cloud which can take about 10 minutes. ItSeez3D does take good scans of objects other than heads.


3. Structure Sensor's own apps: Structure Sensor's own apps (Room Capture, Scanner, Fetch) allow you to use your structure sensor in many ways like playing a AR game, checking how far away something is, scanning a object, or scanning a room. Lets start out with the AR game, it is called Fetch. To start, you scan a area in front of you then a cat on a hoverboard pops on to the screen and you and to move the cat around to reach the ball. The game is on top of your scan data so you can't run through a chair. You can use an app called Structure to see how far something is away or see something in infrared.
To scan rooms you use a app called Room Capture. It works pretty well but it is annoying that you have to stay in one place and not move around. Once you finish scanning you can move around your scan in the app and take measurements. You can then email the room scan to anybody as a OBJ file.


Using the Structure Sensor to scan a Yeti microphone


To scan object you can use Occipital's Scanner app. It can scan objects in color but the color are blended together and not that high resolution. To show you what you have captured the app covers it in white. You can then process your scan in the app and send it to people as a OBJ file.


- Sam (8th grade)

Monday, January 26, 2015

Building the DropLit

Last August, out teacher was introduced to SeeMeCNC at the 3D Printer World Expo in Seattle, WA.  3DPrint.com got the scoop early.  By now, the DropLit is available for $399 on the SeeMeCNC website. All the parts except one are open source and that part you can buy from SeeMeCNC. Most DLP projectors will work but make shure your not using a LCD projector. You check the rest of the specs on SeeMeCNC's website. We went with this projector.

Here is a timelapse of us building it.


And here are some of the issues that we had.


Issue #1: Don't pull the tape off too quickly, because you will tear the fiberboard.
Solution #1: superglue, a clamp, and time

Issue #2: Where does the Arduino go?
Solution: We read forums to find an answer.  We found out that there was as new orientation for the Arduino, which is represented differently in the online instructions.


Overall, the building is going pretty well.

Issue #3:  The base plate orientation was tricky, but we solved it by READING the instructions aloud a few times.

Issue #4: We installed alot of the parts backwards.
Solution: Take it apart, flip it around.


Our projector is in the mail and we will post an update when we finish!

Tuesday, January 20, 2015

Ou New Cube (Take 3!)


Our Cube 3D printer recently started malfunctioning. The printer powered off mid-print, making an impressively loud noise as the build plate crashed back to the bottom. Dramatic, to say the least. I decided to troubleshoot the problem. The first step I took was to try and remove as many variables as possible. We plugged a light into the same power strip the cube was using, to check that the power strip wasn't failing. (Yeah, we could have just plugged it into a different strip, but...). Equipped with my smartphone and a slow-mo video function, we checked the power strip. Nope, not the problem. Then we tried a different file, a different USB stick, a different computer to cut files, everything related to file itself we could think of.  Also nope. We also tried just running the same file over and over and over and over in the hope something magical would happen, but it didn't. Remembering this  and this from earlier in the year, we emailed someone who worked at the Cube company.

Success! He emailed back, and said that it sounded like a motherboard fault. He even offered to replace the printer for free (this printer was originally free, as well)! Needless to say, we took him up on his offer.

Here is a picture of our new cube:


It's Blue!

- Jane (8th grade)

Thursday, October 23, 2014

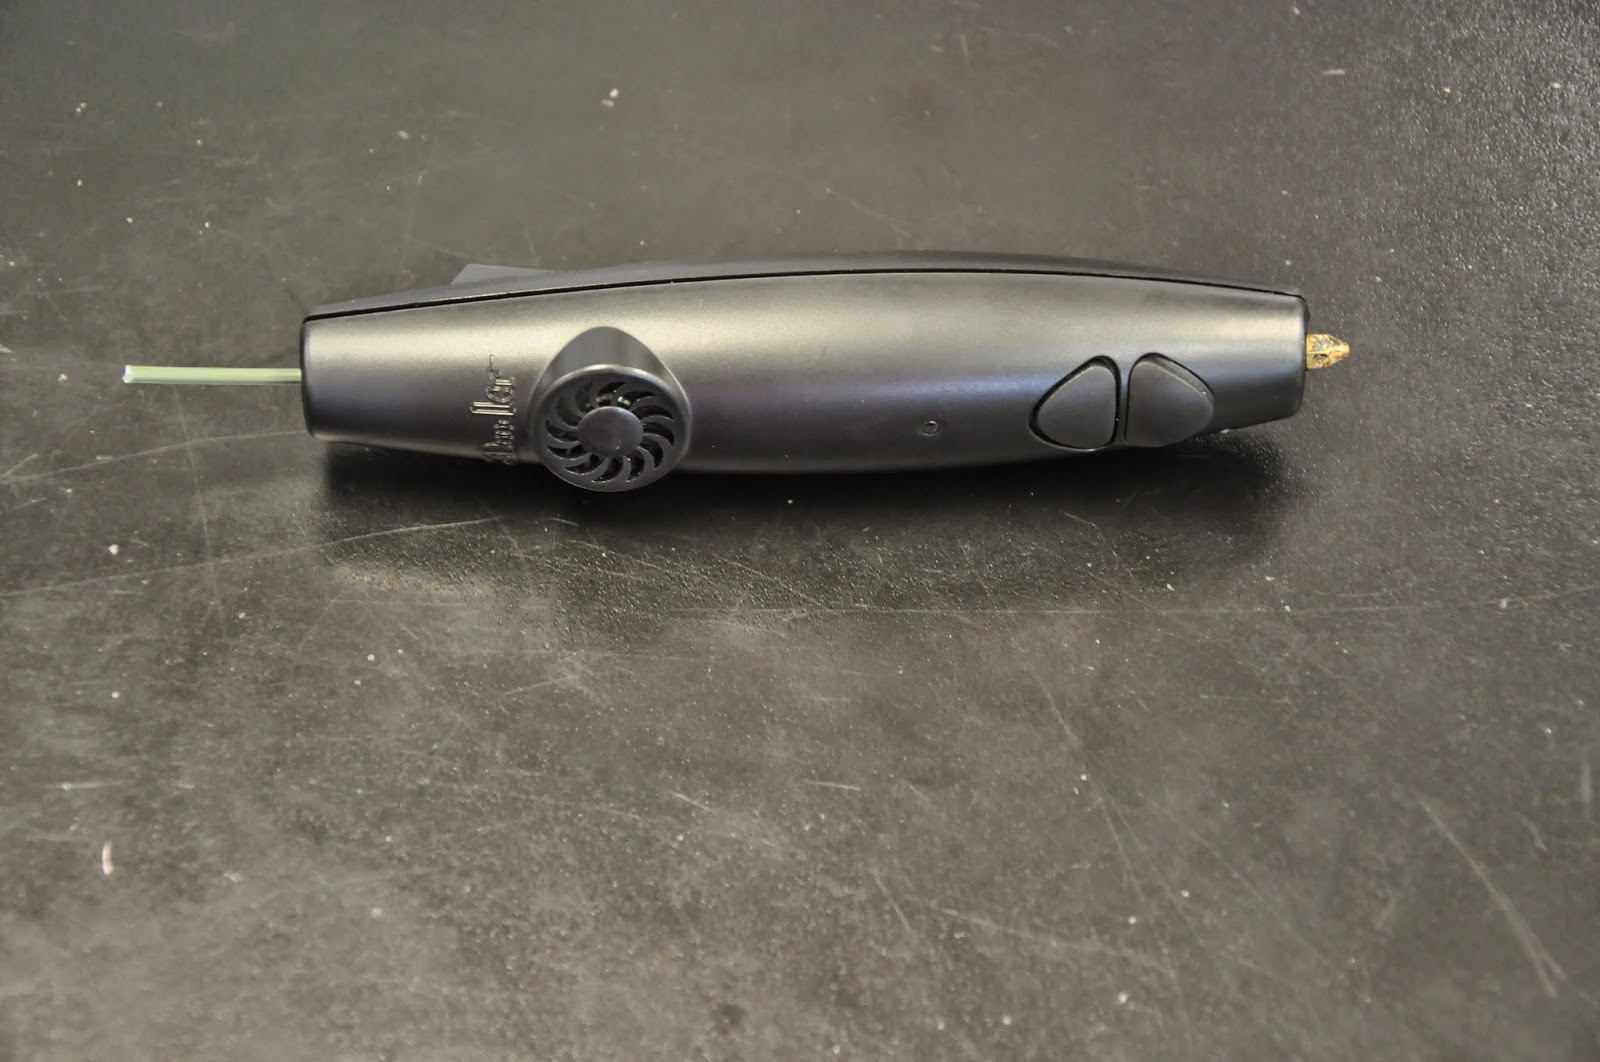
Fixing the 3D Doodler

Ever since we got it a year ago, we have been fighting with our 3Doodler, a glue-gun like pen that allows you to "draw" in 3D by extruding plastic like a 3D printer does. To be fair, most of our problems stem from our use of a cheaper filament instead of buying it from WobbleWorks, the makers of the 3Doodler.  We are a maker club though. What do they expect? After all, our unofficial motto is "It still works..." (said in an indignant tone of voice).

[Teacher note: Or, maybe it's always broken because they are energetic middle school kids...]

Going back to the original point, we tried many tricks to try to fix our 3Doodler. They ranged from shoving a poke-thing up it, to holding it upside down and saying an incantation (it did improve the situation) and were affectionately termed juju-magic.

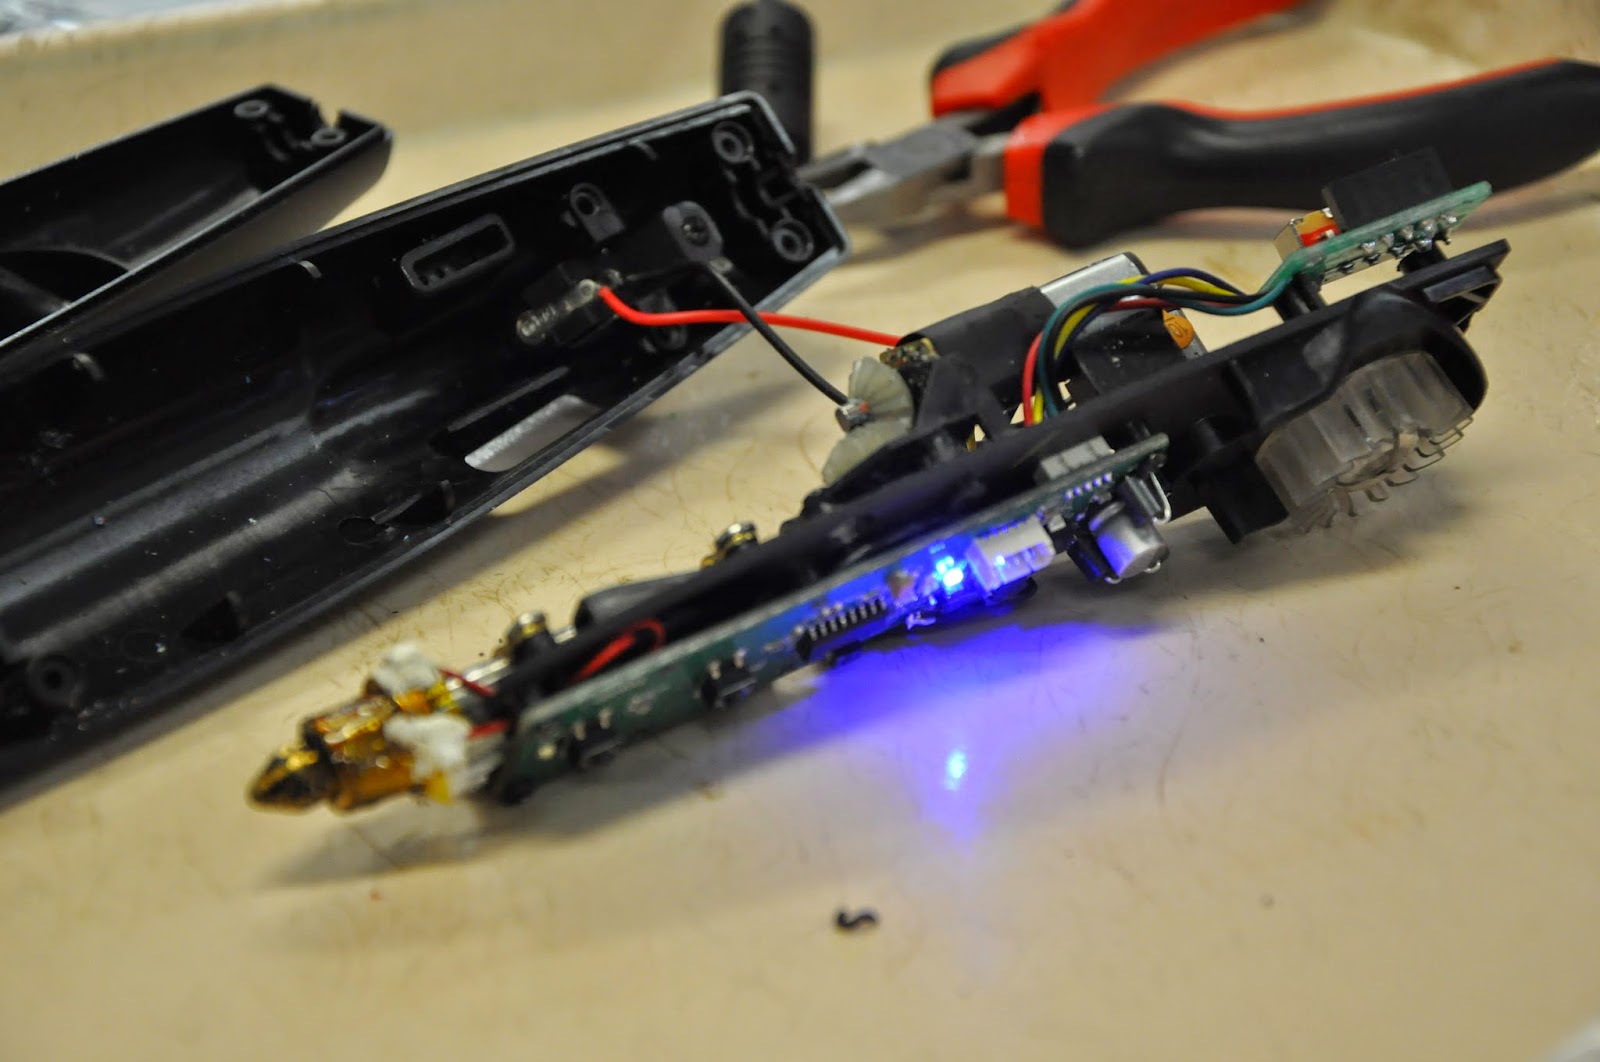
Then, while in desperation at the East Bay Mini Maker Fair I tried switching to using positive reinforcement while talking to the 3Doodler, I learned that earlier my friend had taken it apart as a project to try and fix it (see pics below).  He told me that when our filament, curved from the spools it comes on, was shoved in our 3Doodler (it wasn't my fault...) it over time bent the internal tubing.


Because of this our filament was catching as it went in, frequently jamming. We had the idea of bending the filament to straighten it, thus decreasing the chance of it catching on the bent inside of the tube. With this small modification, and despite the bent inside of the tube, our 3Doodler runs perfectly.

Now the moral of this is either just pay the money and it will work, take apart your expensive stuff, communication is key, or always tweak. I personally prefer the last one and I know many of my fellow BPC makers prefer the second, but for some reason a few of my fellow students prefer the third.

- Daniel, 8th grade


Monday, October 20, 2014

Introducing our Othermill

After our experiences with 3D printing, we have been looking forward to venturing into the long-established world of subtractive manufacturing.  The Othermill is a new tool in our classroom.

The kids will write more about how they use it soon, but one of the first lessons we learned?  It is FAR louder than the 3D printers. :)  The 3D printers basically run all day in my science room.  This one is a little harder to ignore.


Saturday, September 20, 2014

Matter and Form Meets Middle School

This is what our Matter and Form scanner looks like right now:


Here's what it is supposed to look like: 

https://matterandform.net/
Yes, we took it apart.... 

(Note: We really don't recommend doing this.  Nor do the folks at Matter and Form recommend doing this.  In fact, had we not brought it crashing to the ground, dislodging the plate from where it belongs and sending it scattering across the floor, we would have much preferred to have a functional scanner without pipe cleaners! Kids, always get your parent's [or teacher's] permission before taking things apart.)


Of course, our teacher was a little worried about voiding the warranty, but I am pretty sure we voided the warranty when a kid accidentally got his foot wrapped in its power cord and pulled the entire thing to the ground. 

As of yesterday, we hadn't quite gotten our scanner working yet, but we've gotten some OK scans from it. But remember, this is a middle school. We were working on it, but we had it out on the edge of a table. Then... oops.

The scanner did not break it as much as we thought, which is a credit to the construction of the scanner. What the fall did do, however, was dislodge the disk on top of the scanner, so we tried to put the disk back. Then we had to take it apart, because the disk doesn't fit back in from the top.  We had to take the scanner apart and attach the disk from the underside.  (Did we mention that it was all greasy to promote turning?!)


This worked, except we didn't get the motor aligned with the disk.  Well, we didn't really realize the gears needed to align between the motor and the disk.

Then we tried to take it apart again. This time, we broke off some bearing holders inside.  After complimenting its construction, it seems we had found its weakest link!  These tiny pieces of plastic poked up and supported three metal bearings.  Oops.

Not so much of a credit to the scanner, but multiple deconstructions by middle schoolers was probably not a problem that they were anticipating. We came up with a high-tech solution to the broken parts - pipe cleaners. We put pipe cleaners where the holders were, like this:


High tech operation going on here. Here's another pic of the underside of the disk, with our pipe cleaner bearing holders.


We had to take it apart once more, (that's three times if you're counting), because we didn't screw in the back properly. In order to screw it back into the base, we'd have to remove the disk from the top.  Which is what started this entire mess in the first place!  [Teacher's Note: reminds me of this.]  We think that it was originally assembled by a machine, so we can't actually put it back together properly. It does scan, though, it just doesn't have all the casing on.

So now it looks like this: 


We are running a scan as we type this.  So far, so good. 

So, it is working, but... these are all the parts that used to be in the scanner, but aren't right now....
And, just because why not, here is a scan of the Matter and Form scanner taken with our Structure Sensor using Skanect!


Monday, August 25, 2014

3DPW Expo Seattle Report & Droplit DIY Kit!

This weekend, I got myself an expo pass to the 3D Printer World Expo in Seattle, WA.

Now I've got our eye on this SLA machine, Droplit, an entirely open source resin-based stereolithography (SLA) printer soon to be offered by SeeMeCNC!  It will come as a kit, although all the pieces (save for that one metal cylinder shape) are open source!  The UV source comes from a DLP projector from which you will need to remove the UV filter.  To cure the resin?  A UV nail lamp from Walmart!  Now, THAT's our kind of budget.  You can read more about the Droplit on this 3Dprint.com post.


I also got the chance to chat with the Matter and Form folks.  We will be receiving ours any day now!


A 3D printer zoetrope - what a great idea and potentially awesome collaborative school project. :)


Finally, I wanted to acknowledge the Made in Space project.  It's pretty incredible - they plan to send their first printers into microgravity on September 21!


Eventually, they hope to use moon dirt as their "filament" to build what they will need.