 As you may have read in our previous post, our school was lucky enough to have a Cube 3D printer donated to us by 3D Systems two months ago. I let the kids set it up (after all, they've set up my last three 3D printers!) and they were not able to get it to work. So much for "straight-out-of-the-box" printing. :/ The printer was making a terrible noise, and we weren't sure what to make of it. After combing the Cubify blogs and forums, and rewatching the (pretty great) set-up tutorials, we were at a loss.
Eventually, we contacted 3D Systems and sent them a video of the problem, and they replaced the machine. The paperwork on the box indicated a "limit failure" which I have not yet seen detailed anywhere on the web.
With this second machine, I watched the kids like a hawk and, as promised, it was up and printing in a matter of minutes. As for the limit failure, I understand that sometimes these things happen.
Once the machine was up and running, there are some definite pros.
- The machine is E.A.S.Y. to run. You hardly have to deal with leveling the plate, or setting the gap. Once you hit the button; it has just worked. No tangled filament, or random air prints.
- The print quality is great.
- The support material is brilliantly minimal, therefore leaving little residual marks on your print.
- The touchscreen instructions are very clear and you can be printing with little to no 3D printer experience in minutes!
- It looks great, very sleek and compact.

However, we came across a few cons:
- You are locked in to using Cube cartridges for filament. (3D Systems did generously give us four kid-friendly colors to get started.)
- The machine is not intended for tinkering, and therefore it is very hard to come up with solutions to problems when you are discouraged from taking it all apart and investigating.
We also came across some features that were different and will take a little getting used to:
- The build plate is magnetic - it just snaps in place.
- You need to apply special 3D Systems glue to the build plate before using - so there are no rafts - but there have been no issues with curling either.
- In order to remove your final print, you need to submerge the print + build plate in water, until the object loosens up and can be pulled off the plate. (In case you are wondering, a 30 oz Safeway O Organics animal cracker container conveniently happens to fit the build plate perfectly!)


We got a couple great prints from the machine.

And then...
Filament Flow Fail #1: After swapping out the neon green filament, we got the error message "Filament Flow Fail" on the touchscreen.
So we did a little research and read over a post on how to fix a Filament Flow Fail. The blog post makes this sound like no big deal, ending the post with a flourish: "Run one small test print to ensure the Cube is happy, and, voila. Filament Flow Fail is solved!" Well, it didn't go down like that for us.

We heated, and poked, but no bits of filament were coming out. Every day someone would go over and try and fix it, to no avail. Then, one morning, it just worked. Strange. We didn't ask too many questions, and got on to printing.

All was well through our next filament change, where the student forgot to thread the filament through the Cube Tube. In this case, the filament would soon get stretched at an awkward angle, and likely snap. So we aborted the print and (not surprisingly) the filament snapped. (Around the web, there are a lot of complaints (see comments) about the integrity of the Cube filament. It definitely has a different feel than that from, say, Inventables.) There was perhaps a millimeter sticking up from the PrintJet and we intended to catch it with tweezers, but as the nozzle heated up, it pulled the tiny end of the filament beyond our grasp.
Thus initiating...
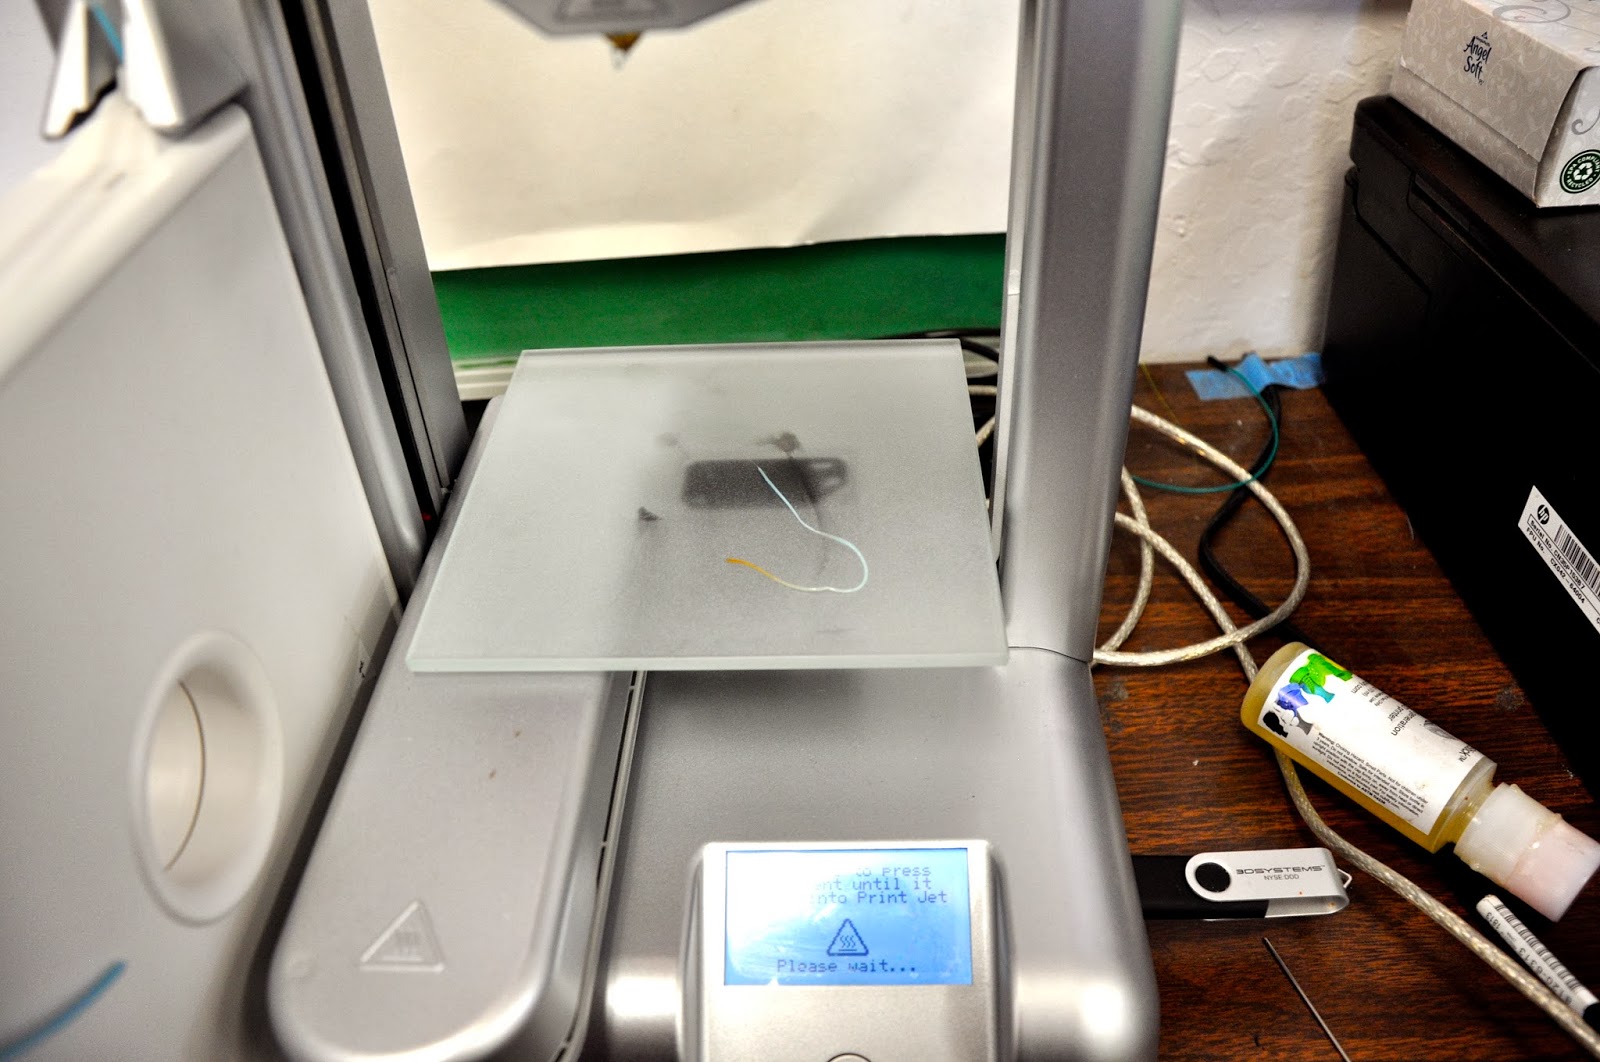
Filament Flow Fail #2: No error message this time. The broken piece would not melt out using the described methods and new filament would routinely get stripped upon re-insertion, indicating a persisting problem. (The image below shows the stripping from Filament Flow Fail #1.)

 Heating and poking wasn't working this time. We found this other post was much more realistic & included this excellent diagram of the mythical insides of the PrintJet. (By this point, one kid had taken apart the broken Cube's PrintJet to study it. I made them hold off on taking apart the functional Cube.)
Then, yesterday, when the kids weren't around, *I* took apart the functional Cube, since this was getting ridiculous. Not only was the filament not coming out, but the nozzle was not even heating up when the screen indicated. (I am pretty sure I voided whatever warranty doing this, but you know the Maker creed.) The issue was quickly apparent. If you look right in the middle there (you can click on the image to zoom in), you can see a tiny blue piece of filament jammed in below the gears. Without the gears being able to engage, the filament wouldn't move. Without the nozzle heating, there was no chance of it melting anyway.

In the illustration below, I have modified the the aforementioned blog author's excellent diagram to illustrate our problem more clearly. I discovered that not only was the piece of filament below the gears, but it was also leaning off to one side. In the left image, you can see how the poking tool would easily push a typical broken filament down and out of the nozzle, but on the image on the right, you can see that, in our case, the poking tool was not making full contact with the filament and was ineffectually pushing the filament piece sideways.

Using a fine tweezers, I wrestled the filament back into an upright position, and watched from the side to learn the best angle of attack. After screwing everything back into place and engaging the "loading cartridge" event, the nozzle heated! This time, the tool was effective and after some initial pressure a big string of filament burst out of the nozzle. Looking closely, the end of the expelled filament was burned and of a different consistency. Sort of reminded me of a bear plug. (I know, I know, that's gross, but thats what you get for having a life science teacher writing this blog!)
After the "filament plug" was expelled, the remainder of the filament was easily pushed out and the new filament was loaded as expected.

So now the Cube is back in action. This entire ordeal inspired continued discussion among the students around open source versus closed hardware and software. I think the expected thing to do in this case was to call the company, and they probably would have replaced the PrintJet, or perhaps the machine. But just by looking inside, we were able to diagnose and solve our own problems.

Thanks for sharing this helpful article,.
ReplyDeleteMini Injection Molding Machine