Saturday, June 22, 2013
Wednesday, June 19, 2013
A Visit to 3D Systems SF
Yesterday, I had the opportunity to go on a "field trip" to 3D Systems San Francisco office. It's in a rather nondescript, black building in SoMa; you wouldn't even notice it if you weren't looking for the small metal plaque near the door. But inside, it is a 3D printer wonderland!
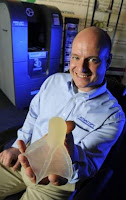
I was introduced to Seth Astle, Industrial Designer at 3D Systems and the designer of the awesome Cadence, a prosthetic limb and bike pedal combo that improves the existing experience for amputee cyclists.
Seth originally worked for San Francisco-based BeSpoke (which has since been acquired by 3D Systems). This company is known for its Bespoke Fairings, often featured in this fairly iconic photo (below). You can read more about these fairings on the website. They are truly awesome, as in 'inspiring-awe.'

The first thing you see when you walk in the ground floor is a series of high-end 3D printers (more on this later). The first thing you see upon walking upstairs is a row of Cubes (3D System's consumer product), furiously printing objects.
Seth talked a little bit about the process, and then showed off some really cool examples:
And, then I saw THE WRENCH. As in the ZCORP VIDEO WRENCH (3D Systems acquired ZCorporation in 2012). As in, the video that started it all. If you know me, I have probably made you watch this video! In fact, why don't we watch it again?
Now, back to the wrench. I was so excited. In fact, I secretly wanted a photo of myself with the wrenches to use a new profile pic. (After all, I do have a picture of myself with the original fish mummies... as well as a picture of myself with the CEO of 3D Systems!) However, I decided to take it down a couple of notches and not be weird. So I just admired them.

I learned a lot about high-end printing on my trip. Basically, there are a variety of options:
Zprinter - This printer contains a powder made of mostly starch with with some plaster. It can print in color (see right) and at very fine resolution. Basically:
SLS (Selective Laser Sintering) - Works in a similar way to the Zprinter, but uses a laser instead of binding material. You can watch this short video to learn more. I learned that many places, including the SF 3D Systems office, do not have an SLS printer, since the fine particulate is a hazard and can explode (like the midwestern silos, I wonder?). So, only particular locations work with them, including the 3D Systems' main headquarters in North Carolina.
SLA (StereoLithography Apparatus) - This printer has a tank filled with many gallons of liquid photopolymer. These prints were super smooth, you could hardly see the layers at all!
Wax printer - This one was new for me. Apparently, wax casting has been used for a long time in making jewelry. But now, you can 3D print the layers in wax. In the photo below, the blue wax has a higher melting point than the white wax.
As I understand it:
 1. The wax model is printed from an stl (or other file), with two different types of wax (one for the model and one for the support material)
2. After printing, the lower-melting point wax (white in this pic) is melted off, leaving the blue original design
3. The blue design is used to make a mold out of plaster, or some other material
4. The mold is heated up, and the blue wax melts and drains out
5. Now, your other material, usually metal, can be poured in and takes the shape of the original blue wax.
For those of you who enjoy an adventure, you can design and 3D print your own rings using this method....
 |
| Cadence |
Seth originally worked for San Francisco-based BeSpoke (which has since been acquired by 3D Systems). This company is known for its Bespoke Fairings, often featured in this fairly iconic photo (below). You can read more about these fairings on the website. They are truly awesome, as in 'inspiring-awe.'
The first thing you see when you walk in the ground floor is a series of high-end 3D printers (more on this later). The first thing you see upon walking upstairs is a row of Cubes (3D System's consumer product), furiously printing objects.
Seth talked a little bit about the process, and then showed off some really cool examples:
 |
| (paused mid-print to add metal rings) |
 |
| (awesomely fine resolution) |
 |
| (some whimsy in the shop) |
And, then I saw THE WRENCH. As in the ZCORP VIDEO WRENCH (3D Systems acquired ZCorporation in 2012). As in, the video that started it all. If you know me, I have probably made you watch this video! In fact, why don't we watch it again?
Now, back to the wrench. I was so excited. In fact, I secretly wanted a photo of myself with the wrenches to use a new profile pic. (After all, I do have a picture of myself with the original fish mummies... as well as a picture of myself with the CEO of 3D Systems!) However, I decided to take it down a couple of notches and not be weird. So I just admired them.

I learned a lot about high-end printing on my trip. Basically, there are a variety of options:
 |
| printed head |
- A roller spreads a fine layer of powder (0.1 mm or LESS in height!) across the build area.
- The inkjet printer head sprays a binding liquid in a layer than matches that particular layer's cross-section of the part. This solidifies the powder in that cross-sectional area.
- The roller returns to the powder chamber where it lifts as the build chamber drops and the process of spreading a layer of powder and spraying the binding liquid repeats.
- This is done, layer by layer, until the part is complete.
- Excess powder is brushed off and extra powder is recycled back into the machine.
- Some post-processing is done. The object is basically dipped in a super-glue bath, which then soaks in and fills up andy little holes in the model, making it watertight and strong
SLS (Selective Laser Sintering) - Works in a similar way to the Zprinter, but uses a laser instead of binding material. You can watch this short video to learn more. I learned that many places, including the SF 3D Systems office, do not have an SLS printer, since the fine particulate is a hazard and can explode (like the midwestern silos, I wonder?). So, only particular locations work with them, including the 3D Systems' main headquarters in North Carolina.
SLA (StereoLithography Apparatus) - This printer has a tank filled with many gallons of liquid photopolymer. These prints were super smooth, you could hardly see the layers at all!
- Once you input a file, the 3D printer's laser "paints" one of the layers, exposing the photo-sensitive, liquid plastic in the tank and hardening it.
- The platform drops down into the tank of liquid a fraction of a millimeter and the laser paints the next layer.
- This process repeats, layer by layer, until the build is complete.
- Then you have to rinse off the object and "bake" it in an ultraviolet oven until the plastic iss thoroughly cured.
According to HowStuffWorks, "Stereolithography is not an inexpensive process. The machines themselves usually cost in excess of $250,000. They have to be vented because of fumes created by the polymer and the solvents. The polymer itself is extremely expensive. CibaTool SL5170 resin, a common photopolymer used in stereolithography, typically costs about $800/gallon. For these reasons, it is uncommon to find stereolithography machines anywhere but in large companies."
Wax printer - This one was new for me. Apparently, wax casting has been used for a long time in making jewelry. But now, you can 3D print the layers in wax. In the photo below, the blue wax has a higher melting point than the white wax.
As I understand it:
 1. The wax model is printed from an stl (or other file), with two different types of wax (one for the model and one for the support material)
2. After printing, the lower-melting point wax (white in this pic) is melted off, leaving the blue original design
3. The blue design is used to make a mold out of plaster, or some other material
4. The mold is heated up, and the blue wax melts and drains out
5. Now, your other material, usually metal, can be poured in and takes the shape of the original blue wax.
For those of you who enjoy an adventure, you can design and 3D print your own rings using this method....
Finally, if you are still excited to read more about the various types of 3D printing, you can visit this site to read some of the advantages and disadvantages of the types listed above. [UPDATE 11.4.13: Or, to learn more, you can read all about this blog post about visiting Stratasys, the other major 3D printing company in addition to 3D Systems.]
Stratasys Merging with Makerbot

Well, I'll be. Stratasys, maker of expensive, industrial-quality 3D printers is merging with Makerbot, the leader in accessible, desktop 3D printers. According to the 6.19.13 news release, Makerbot "has sold more than 22,000 3D printers since 2009. In the last nine months, the MakerBot Replicator 2 Desktop 3D Printer accounted for 11,000 of those sales." Incredible.
It is Maketbot's success in the consumer market that led a recent TechCrunch article to compare Makerbot to Apple:
3D printing isn’t new, just as computing wasn’t new when Apple hit the scene. Makerbot, like Apple, made it accessible.
3D printing has been around for over 30 years. Stratasys was founded in 1988, just two years after 3D Systems, which is credited as the first 3D printing company. (The first working 3D printer, designed by Chuck Hull of 3D Systems, used the stereolithography technique - which is where the .stl file type comes from. He hold the patent for stereolithography... pretty cool, eh?)
Anyway, back the the merger. The proposed merger has an initial value of $403 million (in stocks). Right now, it's planned that MakerBot will operate as a separate subsidiary of Stratasys - keeping its brand... and Thingiverse. For now. Makerbot already let go of its open-source roots when the Replicator 2 came out. These machines are reportedly being used more and more by "prosumers" - engineers and other professionals. It will be interesting where all of Makerbot's loyal "makers" will fit into all of this.
Anyway, back the the merger. The proposed merger has an initial value of $403 million (in stocks). Right now, it's planned that MakerBot will operate as a separate subsidiary of Stratasys - keeping its brand... and Thingiverse. For now. Makerbot already let go of its open-source roots when the Replicator 2 came out. These machines are reportedly being used more and more by "prosumers" - engineers and other professionals. It will be interesting where all of Makerbot's loyal "makers" will fit into all of this.
Big Bang Theory Plays with a 3D Printer!
Man, "The Big Bang Theory" does all the cool stuff. I was thrilled that they did a clip with cornstarch on a speaker.. I should have figured something as enticingly geeky as 3D printing did not escape their writers. I love that show! (Too bad I always forget to watch television.)
Anyway, I was googling to see if there are ny other 3D printing T-shirts besides Printrbot's and landed on the Cafepress design "It worked. We printed a whistle. - The Big Bang Theory Quote." What?! More searching revealed this quote came from a clip which originally aired on January 31, 2013 in the episode "The Cooper/Kripke Inversion." (This 3Ders blog post basically gives you basically a transcript of the whole 3D printer subplot.)
The highlights of Howard's purchase of a used "1200 XT 3D modeler PRO" machine for $5000 include him getting to scan Raj with a Microsoft Kinect to print out his action figure. Later, he presents Bernadette with a his and hers customized dolls. And although Bernadette loves the dolls, she doesn't quite appreciate the joy of 3D printing... I get it. That's most people's reactions when they find out I saved my own money to by a Makerbot. Clearly *I* think it's worth it, Howard!
Want your own action figures of yourself? Check out Firebox or Action Figure Labs online. Or if you happen to be in Japan or Chicago, check out OMOTE 3D SHASHIN KAN or The 3D Printer Experience. Or you can just print your head. These particular heads are Lego-compatible!
3D Printing a DUCK FOOT?!
This week, Joel Graves, a 3-D printing engineer at NovaCopy, printed the prototype for a mold that will eventually be used to create a prosthetic foot for a DUCK! Buttercup, the duck, was born in a high school science lab last year with a backward foot.
And, we here at BPC, love ducks - hatching them AND printing them!

In the meantime, Garey photographed the duck stump, combined the images using Autodesk, modeled the new foot after duck-sister-Minnie's left, then sent the design to Graves at Novacopy. (Shoutout to Novacopy - as I understand it, the company is donating its services to help Buttercup!) Once Garey receives the 3D-printed foot, it can be used to mold the new silicone foot.
For more information (OK, a LOT more detail, including pictures!), check out Buttercup's FACEBOOK PAGE?! Here is Buttercup considering one of the silicone options...

(duck images courtesy of the Facebook page)
UPDATE 6/29/13: CNET has a nice write-up on the story. It's pretty fascinating to see how many news avenues have picked up this story. Ducks, 3D printing, and philanthropy (philanaspy?) - what could be more compelling?
AND, Buttercup's foot is in the process of being molded!
Tuesday, June 18, 2013
Printrbot has T-Shirts

Made me wonder... are there other 3D printing shirts? A quick search on CafePress and Zazzle tell me not too many... yet. Is it CustomInk time?
Thursday, June 6, 2013
Kids designs are becoming the norm!
While it has been fun downloading things off Thingiverse, I know that it is important to get kids to design their own models form their own ideas. Luckily, there is a lot of free programs which help me do that. This student created his airplane using TinkerCAD.


Sunday, June 2, 2013
3D Modeling Options for Kids
In the months we have been exploring our 3D printers, we have tried a variety of 3D modeling options for kids to create their own models, and we've come up with the following options. They are all, of course, free!
From easiest, but least flexible to more options, but very complex:
Other (not-free) tools we know about but have not yet explored include:
Other resources (ideas?) to be added soon...
Blender
OpenSCAD
FreeCAD
From easiest, but least flexible to more options, but very complex:
- 3DTin - Currently my student's favorite. This browser-based modeling program has a very simple interface - just choose 3D shapes from a library add them to your sketch. Free because "when you create content on 3DTin.com, it becomes a publicly available artwork under Creative Commons Attribution-ShareAlike license (3.0) (unless explicitly specified otherwise)." All sketches can be exported in STL, OBJ, DAE file formats. [UPDATE 9.19.13 - 3DTin was acquired by Lagoa. We'll see if / how this matters.]
- TinkerCAD - It was suddenly gone, then just as suddenly back, thanks to Autodesk. Exports to STL.
- SketchUp - Exports to STL
- Autodesk software - industry standard. Free to educators and students.
Other (not-free) tools we know about but have not yet explored include:
- Shape-It-Up -a program that lets the user build shapes from hand gestures using a Kinect 3D camera. And I missed the demo at Maker Faire?!
- Solidworks - industry standard CAD program - with, I believe, a price to match?
Other resources (ideas?) to be added soon...
Blender
OpenSCAD
FreeCAD
Subscribe to:
Posts (Atom)