
Here are the steps we took:
 1.You start out by going to FILE >> OPEN. and opening the tiff stack.
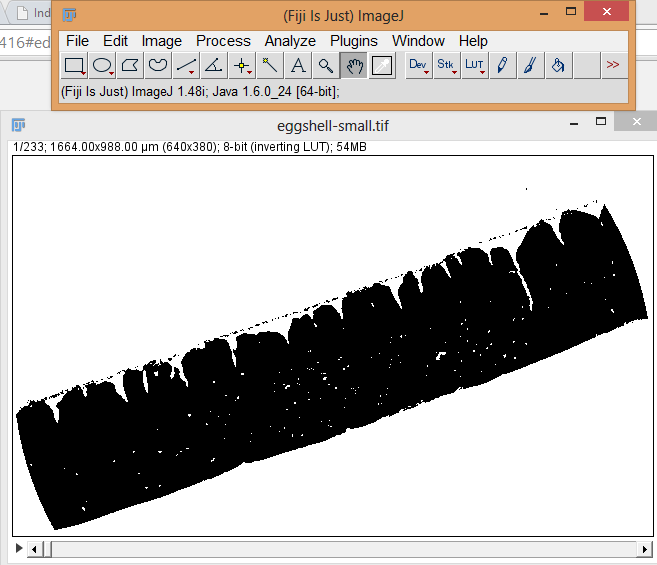
2. Then you create a binary from the tiff stack by going to PROCESS >> BINARY >> MAKE BINARY
It turns into this

3. If your model has holes in it that you want to fill you can go to PROCESS >> BINARY >> FILL HOLES. If your model still has holes then repeat step 3.


4. If you want to make your file smaller then go to PROCESS >> BINARY >> DILATE it will condense 4 pixels to 1 pixels. If you want it super small keep repeating step 4.


5. If their are stray pixels then go to PROCESS >> BINARY >> ERODE. If there are still pixels repeat step 5.


6. Once you complete steps 3-5 you go to PLUGINS >> 3D VIEWER. Don't worry if your computer freezes; this is a complicated process. A new window should come up.


7. To create the 3D surface you go to EDIT on the new window >> DISPLAY >> SURFACE Don't worry if your computer freezes; this is a complicated process. You should now have a 3D model!


8. To export you go to FILE >> EXPORT SURFACES >> STL(BINARYorASCII)
That is how you take an TIFF stack and covert it to an STL. I took the STL file and put into the Cube software but you can do what ever you want. NOTE: MOST PRINTERS CAN ONLY HANDLE FILES LESS THAN 50 MB. (If your file is too big, you can simplify / decimate it in MeshLab.)

 |
| (screenshot of reconstructed data from a different, not open-source software) |

great post!
ReplyDeleteI helped me a lot. I had to work with similar data. and you explained each step so well.
thank you.
Elmar
This post helped me a lot too. Thanks! :D
ReplyDeleteAmazing! Thanks a lot
ReplyDeleteThanks...
ReplyDeleteYour post is so helpful.
aAB