Sunday, April 27, 2014

A Tale of Two Extruders: Delrin Plunger Upgrade Kit

The Delrin plungers on our Replicator Dual were wearing out and therefore making the filament slip and jam. So we could not print anything effectively on the Replicator. So some maintenance was needed.

An upgraded extruder is available and it was being used on some of the newer printers. Turns out, Makerbot already admitted that its extruders are kinda weak.  In fact, right on their website Makerbot says, "another thing that can cause extrusion trouble is the deterioration of the Delrin plunger inside the Stepstruder."  Makerbot is offering a FREE upgrade for the cost of shipping... for the Replicator 2, but not for the Replicator Dual.

We found our Replicator I replacement part on ebay, and Amazon.  If we were less lazy, we could print one out on Thingiverse.

To replace the Delrin plunger follow this tutorial.  To start, we had to take apart the extruders.
Sam and Abe taking apart the Makerbot
At one point, our teacher had to take deep breaths, thinking we might not ever get it back together. 

This was taken is the maker bot with one of the extrudes.
Then replacing the old black Delrin plunger with the new, 3D printed, gray one.
Here is a picture of the old plunger (left) and the new (right.)
Then it printed!!!
This was the first filament it extruded
The first full print

You can read more about the upgraded extruder here.

- by Abe (7th grade)

Lesson Learned


Actually, two lessons. 

The first lesson:  The computer can't shut down while a print is running. So, if the settings on the computer go to sleep after, say, 1 hour, and the print runs for 2 hours, you'll end up with half a print. 

Lesson two: In a middle school classroom, the computer setting are not the only thing that shuts down the computer. Actually, there are 25 things. 24 of which are students. Someone shut the lid on the computer running our printer, so we ended up with half of a (very lengthy) print. The low-tech solution in the picture above works pretty well so far. 

By Jane (7th grade)

Friday, April 11, 2014

How to use Autodesk 123D Catch to Scan an Object

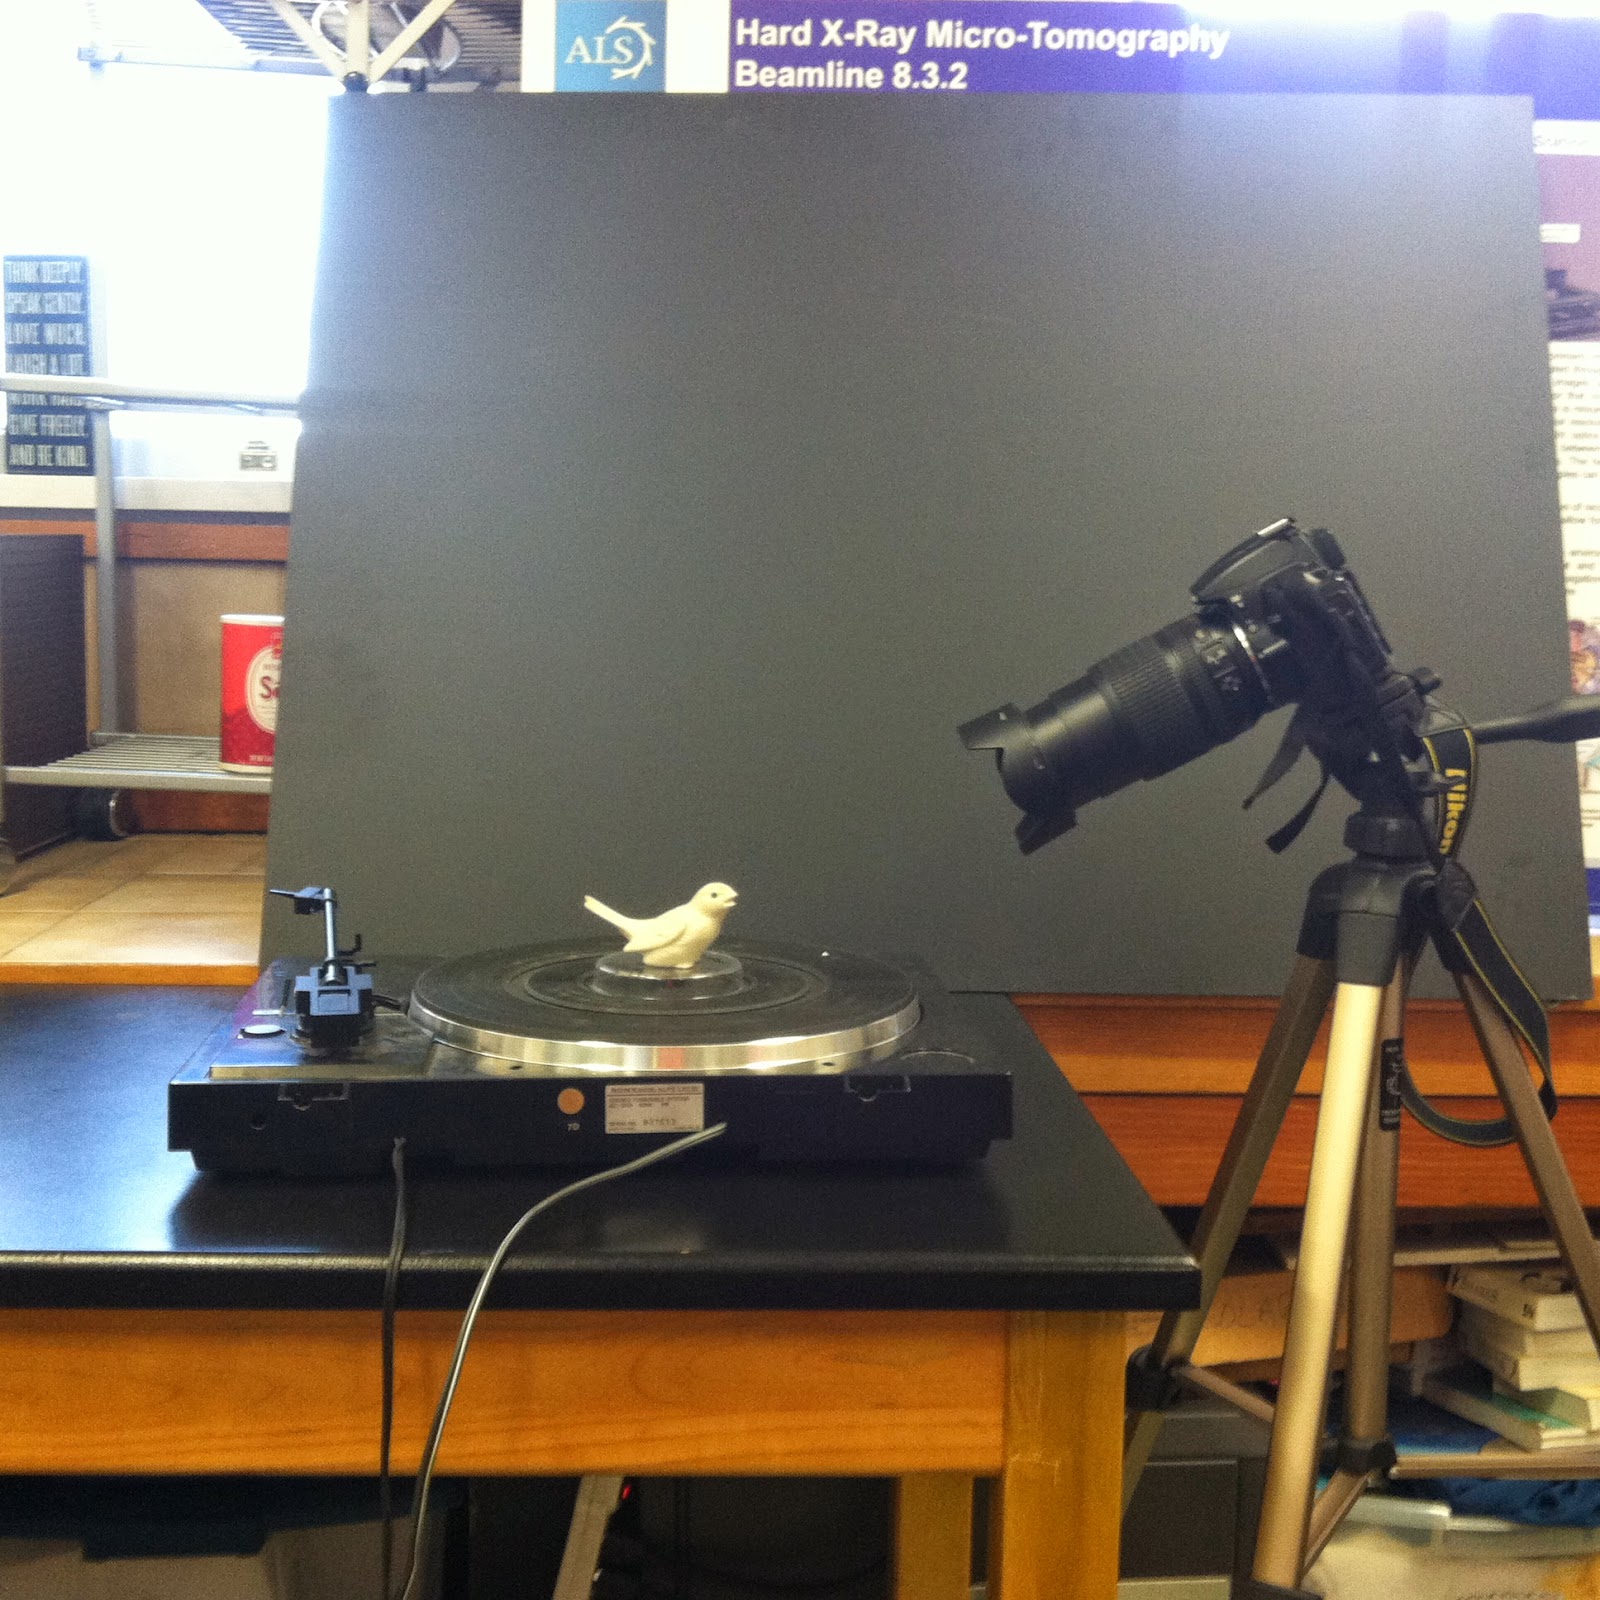
1. You need something that can spin with an object on it like a record player,  a camera and a tripod. You will also need a computer with a web browser that supports WebGL and an internet connection.

2. Make sure to take the exact number of photos specified because 123D Catch only allows you to upload up to 70 photos. Take 30 photos at a 45 degree angle of the object while spinning it. (see picture on the right)
3. Take 20 more photos at a more elevated angle while spinning the object. (see photo on the left)


4. Take 20 more photos at a low angle while spinning the object. (see picture on the right)
5. Upload the photos to Autodesk 123D Catch App.
6. Wait for Autodesk to process the photos.
7. Select and Delete any unwanted objects in the photos.
8. Then Select File>>Download as an STL.
9. Print on your 3-D printer.


Don't worry if your first try doesn't work.  Try again. In my experience,  it works 50% of the time.
Here are pictures of the completed scan:


Thursday, April 10, 2014

Tips for 123D Catch

We "recently" got an iPad air and have started downloading scanning apps. The one I'm using right now is called 123D Catch a free 3D scanning app from Autodesk. You take multiple pictures at many angles and it puts them all together to make a 3D image. The Styrofoam head I scanned turned out to look a bit like a mask. Still, not bad for a 2nd try (the first was of someones head. It failed). 123D Catch uses photogrametry to work which is using triangulation to find the XYZ coordinates of a voxel.

We also tried using a DLSR camera.to take 70 pictures of a Jackel and then turn it into a 3-D model using 123D-Catch. We got a pretty good 3-D model(on the right).

The next time we tried, we used a record player to spin a bird and took 70 pictures at 3 angles. We got a perfect 3-D model!

- By Sam and Luka (6th grade)

Thursday, April 3, 2014

3D Scanners - What are the Options?


[This post represents a collaboration between me, the teacher, and a number of my middle school students.  It continues to be a work in progress!]

While CAD is fun, I am keenly interested in students' capturing their own data to work with and print.

So, we looked into a couple of ways we could make this happen:


    1. Photogrammetry is the science of making measurements from photographs - geometric properties (gives texture, and is dynamic). Photogrammetry relies on triangulation (Using triangles to determine the XYZ coordinates of a voxel) to make a 3-D model of an object An example of this is Autodesk 123D Catch which allows you to take about 70 pictures of an 3-D shape
              and make a 3-D model of it.   

    2. Laser line 3D scanning is a non-contact method of capturing the shape of a 3 Dimensional object. It uses a laser and 1 DSLR camera. If  you have the camera the cost can run as low as $20. The laser allows you to use triangulation because it creates a known angle in relation to the camera.


    3. A structured-light 3D scanner is a 3D scanning device for measuring the three-dimensional shape of an object using projected light patterns and a camera system. Good tutorial


    More notes we are working on:
    • utilize a 3D scanner (some DIY models run as low as $300 / higher end models run into the $1000s)
    • https://www.matterform.net/review
    • http://www.matterform.net/faq
    • http://solidsmack.com/fabrication/matterforms-photon-3d-scanner-is-a-point-cloud-of-beauty/
    • Makerbot Digitizer
    • (new) Structure Sensor - a Kickstarter for a mobile scanner for your iPad.
    • (added11.12.13) 3D Systems Sense 3D scanner - just heard about it, need to learn more
    • visit a local makerspace that may allow you to run your own scans on their equipment
    • use a service like Autodesk123DCatch - http://apps.123dapp.com/catch/ - where you send in a series of 2D photos (taken in class) and they send back a file with a 3D reconstructed constructed model.

    Time-of-Flight Scanners
    Triangulation Scanners
    Structured-light Scanner
    Stereoscopic Scanner
    Photoscopic Scanner
    Silhouette Scanner


    structured light vs laser CCD
    David Laser Scanner
    CadScan 3D (now called Cubik)

    Other things to watch: 
    http://www.trimensional.com/

    http://www.engadget.com/2013/03/16/insert-coin-semifinalist-moedls-3d-scanner-for-your-phone-hands/
    http://www.indiegogo.com/projects/photon-3d-scanner/


    Open Source CT scanner (cool!) http://makezine.com/magazine/make-38-cameras-and-av/open-source-ct-scanner/