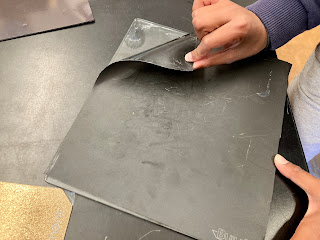
Today, we received our new magnetic build plate! The Prusa we have also has a magnetic plate so we decided to put one on our Ultimaker to make it easier to remove prints.
We ordered the build plate from this website. The QR code in the box led us to these instructions.
First, we had to clean the build plate. To do this, we used IPA alcohol, and a cloth napkin to remove any grease and filament debris. This was quick, considering the IPA removed most of the debris from previous 3d prints.
First, we had to clean the build plate. To do this, we used IPA alcohol, and a cloth napkin to remove any grease and filament debris. This was quick, considering the IPA removed most of the debris from previous 3d prints.
Since the magnet could only be installed on a glass or aluminum bed, we had to remove the BuildTak from the build surface. This step was really important because the magnet we were using was only a one-time use, so ensuring to remove any plastic on the build plate was important.
Now that the glass bed was cleaned and had the BuildTak removed from it, we were ready to align the magnet. Basically, the build plate has 3 parts, the first is your glass or aluminum build plate. Then, on top of it is your magnet, this is what makes the build plate magnetic. Finally, the last part is the printing surface, this is what you directly print on, it is magnetic so that you can remove it and bend your prints off!
Finally, with the printer leveled and ready to go, we needed to do one last thing. And that is to change some slicer settings. When using our Ultimaker we us Cura as our slicer so we just changed a few settings:
If you want to know more about other settings we changed you can find them here.


No comments:
Post a Comment