The kids made bath bombs and henna, build a giant cardboard tank and a very tiny metal foundry, constructed a duct tape hammock, figured out dual extrusion, and even turned old tires into seats! For a list of all the student projects, visit our school STEAM blog.
A blog intended for, and often written by, my middle school students, as well as anyone interested in the fascinating potential of 3D printing and the process of getting there. Since our blog's start in 2013, we've expanded our content a bit to incorporate our other middle school making. Click the "Our BPC Story" blog label to learn more about our Maker Club journey.
Wednesday, June 14, 2017
From After School Making to School Maker Faire
On May 26th, BPC had its first official School Maker Faire. (We've done unofficial "micro-maker faires" in the past.) What started as something we did in an after school club three years ago (making) has now fully infiltrated seventh grade science!
Sunday, June 4, 2017
Screen Printing for Awareness
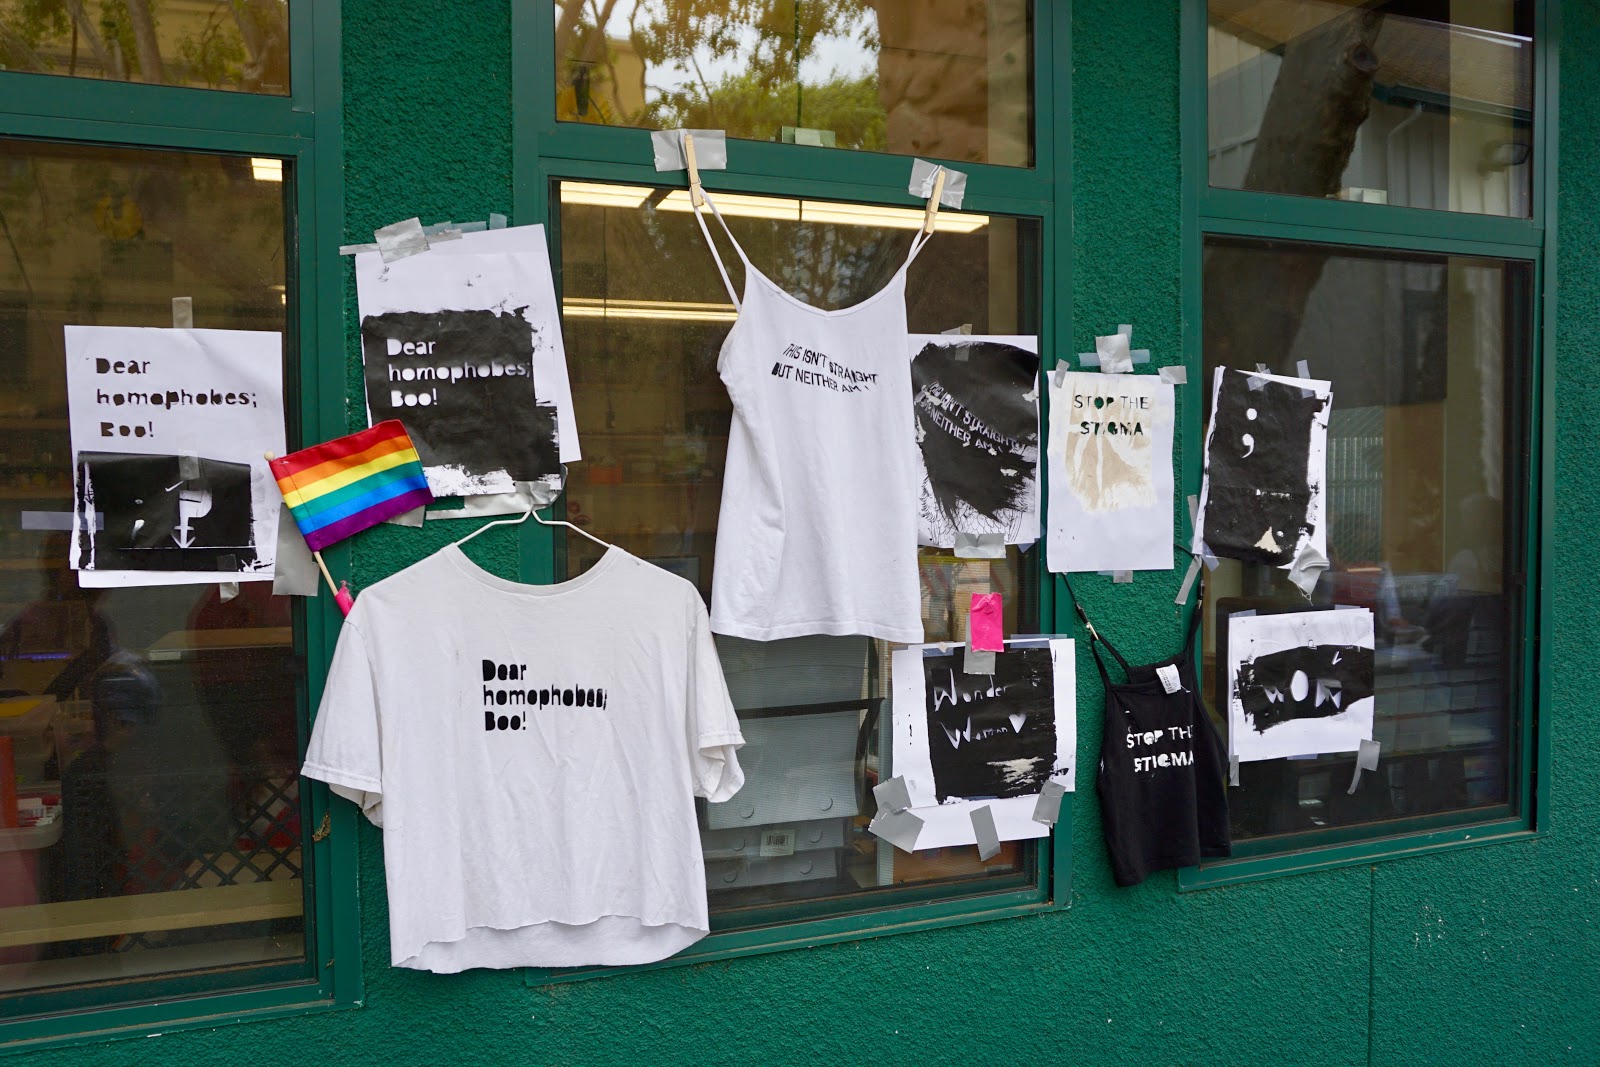
I Screen Printed onto old shirts to raise awareness for the LGBTQ+ and mental illness communities. I noticed that representation in the media of the LGBTQ+ community is sparse, and there is almost no representation of people who fight with mental illnesses. Seeing yourself represented in the media can change someone's outlook, make them feel hopeful, and can show them that they are not alone. Lack of representation can isolate groups of people and I wanted to combat this problem with creativity. At first I wanted to make a clothing line, however time and material constraints proved that to be unfeasible so I decided to try screen printing. I had never screen printed before, so I had to learn from Wikihow. I started out by coming up with phrases to ink onto the shirts, for instance “Dear Homophobes; Boo!”. 
(Image from the school Maker Faire taken by Ms.Mytko)
I tried cutting out the phrases, however this was challenging to do with scissors. I decided to try printing it out first, then using an exacto knife to trace the lines. This worked well but it still wasn't time efficient. I finally attempted to laser cut my design, this was not only time efficient but it was also a great learning experience. I cut old undershirts and screen printed my phrases onto them. This project costs around 45 dollars for the baseline materials but it can fluctuate significantly for the unnecessary materials.
I learned that it's okay for there to be small mistakes and sometimes those mistakes can improve the style of the shirt. I would enjoy marketing this into a business on Etsy, I will continue to screen print at home and I will possibly sell some shirts. If you are interested in this project make sure you set the ink into the shirt before you take off the screen, this will ensure better quality prints. Don’t give up when the ink smears, or doesn't come off, you can always go over your design with an ink dipped pencil. If you don't focus on the mistakes, but rather on the quality parts of your print, you will end up a lot happier!
This is the Wikihow site that was incredibly helpful in teaching me how to screen print: http://www.wikihow.com/Make-a-Screen-Print#With_an_Embroidery_Hoop_sub
Labels:
Advice,
Cothes,
Design,
Design Tips,
Lasercutter,
Learning,
Maker,
Our BPC Story,
Prototyping,
Screen Printing,
Troubleshooting
Subscribe to:
Comments (Atom)


