Wednesday, October 12, 2016

Iteration, Constellations, and Model Clams

Both in the Makerspace and on this blog, we talk about appreciation of iteration. Every project goes through iterations, and in some cases a lot of iterations. Recently I've been working on a necklace and a modeling project that have both gone through a lot of iterations. The necklace (a model of a constellation, originally designed to test out the copper filament on our Afinia), was the first copper-filament project we'd done on the Afinia for a while, and I ran into some issues getting it to print well, as well as some general workflow issues.

At first, the printer wouldn't connect to the laptop, but that was resolved by unplugging and plugging it back in several times. This has turned out to be a fairly common problem with the Afinia, and we haven't figured out another solution yet.

Once we had it printing, the raft printed just fine, but it started to air-print after that. So I restarted it. And it failed again. And again. So I opened it up, cleaned out the inside, and ran it again. This print worked, but was the wrong size (iteration 1). So I ran it again. And it failed. So I opened it up again, cleaned it, and ran it again.

This one worked, but was missing some parts due to a software error (iteration 2). and some minor software and design issues later (iteration 3), I switched printers. Iteration 4 was quite nice, but the copper filament we have doesn't work on the Makerbot. So, back to the Afinia for iteration 5. A little analog repair work later (did you know a soldering iron can be used to melt 3D printed plastic?), iteration 5.5 was the final product.

Iterations 2, 3. and 4 of the necklace


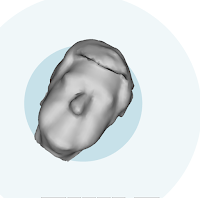
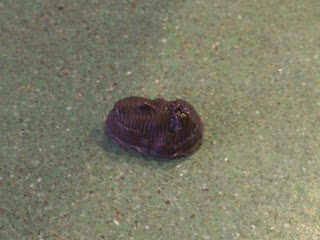
My next project, a model for one of my high school classes, also started on the Afinia. It tipped over during  the first printing (iteration 1), so I cut off the bottom (iteration 2) and tried again. This one peeled off the build surface (iteration 3), so I switched printers again, to the Makerbot. Iteration 4 printed quite well, making this project slightly shorter.


The final model


Sunday, October 2, 2016

Importing a 3D scan or STL into Fusion 360 for the Othermill

This is just a quick tutorial on how to import a 3D scan or STL file into Fusion 360 for Othermill, or any other CNC mill. Ends up, you can't just import in if it is made out of triangles and not quads. The easiest way to test this is to import and right click and see if it gives you the option to  convert to B-REP Surface. If it doesn't we have to go the long way to get it into Fusion 360.

1. Import the OBJ file into Autodesk Remake.  Remake is made for editing scans and other similar files.


2. Next we need to edit the file down to just what we need to do this use the Selection tool and then right click and select Delete. Next we need to fill in all the holes, which you can use the Fill Holes tool for.  


3. After that we need to decimate the file to less than 30,000 triangles (or decimate it to less than 10,000 if you are doing this on a laptop). This is for performance reasons after you get into Fusion 360.

4. Export as a OBJ file for Fusion 360.

5. Import to Fusion 360, using Insert Mesh


6. Next, Right click on the mesh, and click convert to B-REP
Now you have a Fusion 360 model which you can edit and mill on the Othermill. To read one way I've used this process in my own work, please visit my blog post: 3D Scan to Chocolate in 48 Hours.

Saturday, October 1, 2016

Scan to Chocolate in 48 hours

This weekend's project is to create chocolates in the shape of my art teacher's face. My goal is to do this in less than 48 hours. The basic process includes the following steps:
  1. 3D scanning of the face
  2. Design chocolate CAD file
  3. Export design for Othermill
  4. Mill into wax
  5. Create silicone mold
  6. Pour chocolate
STEP 1: 3D scanning of face


To start out I needed to capture my teachers head in 3D. To 3D scan something there are many options, like using 123D Catch, and Remake both utilize your smartphone or DSLR camera to create 3D scans. I opted for an easier option using the Structure Sensor. It is a sensor that clips on to the back of an iPad. I choose it because it takes me 1-2 minutes to scan a head instead of 5+ minutes for 123D Catch and Remake. To scan somebody with the Structure Sensor all you have to do is walk around them then the app, ItSeez3D, processes the data and produces a 3D model. I then uploaded that file to Sketchfab.


STEP 2: Design chocolate CAD file


Now that I have the 3D model the next step was to bring it into Fusion 360. I thought this step was going to be easy. I was so wrong. 

I first tried importing it just as an OBJ file but Fusion 360 didn't like it. I went online and found different ways to import OBJ files. When I finally got it imported, the CAM part of Fusion 360 didn't work on it. So back with more googling, I found I needed to convert it to a B-REP Surface.  The steps I used to accomplish this are:
  1. Import the OBJ file into Autodesk Remake.
  2. Decimate the file to less than 30,000 triangles (decimate it to less than 10,000 if you are doing this on a laptop).  The number of triangles refers to the number of flat surfaces that make up the curved mesh--it is like the detail level of a 3D printer. (Read more about triangles in models here.) We need to make the number of triangles lower so the model is easier to process. 
  3. Export as a OBJ file for Fusion 360.
  4. Import to Fusion 360, using 'insert mesh'
  5. Right click on the mesh, and click 'convert to B-REP'
You can read more about how to do this here.

STEP 3: Export design for Othermill

Now that it is in Fusion 360, I started the CAM process. CAM stands for Computer Aided Manufacturing, in this context it is telling the othermill how it should mill your part. This is similar to the slicing process for the 3D printer. This process was arduous because I only decimated it to 25,000 Quads and I was running on my laptop. I finally got fed up and just exported it for the Othermill, but in my haste I forgot to add a finishing process so the first version didn't turn out well. After I had a good night's sleep, I started running it on my desktop which is much faster and has a dedicated GPU. I am not going into much detail on how to use the Othermill with Fusion 360 because they already have a great tutorial on it. I choose the Othermill because it is easy to mill once you have the design and file.

Now back to the design, I wanted to make little faces of my teacher, I settled on making four of them. I copied the model four times and then moved on to the CAM process. You can view my file here.
For the CAM, I used an Adaptive Clearing tool and a Parallel Tool for the final finish. Next I exported it as a .gcode file for the Othermill and put it into the Othermill software.

STEP 4: Mill into wax
I connected the purple wax to Othermill with Nitto Double Sided Tape (available at OtherMachine Co or other suppliers). Nitto tape works extremely well, much better than double sided tape. Then I started milling. The milling took 4 hours to complete.  I  decided on using a 1/16 ball end mill, because 1/16 would give me enough detail, and want it to take more time. 1/16 bits also rarely break unlike smaller sizes.

STEP 5: Create silicone mold

Now it is time to pour the silicon. I use silicone from Other Machine Co, mostly because it is rated as food-grade. I mix the orange and white in equal parts in a cup, then pour it into the mold, I let this set overnight.


STEP 6: Pour chocolate!
To melt the chocolate I used a double boiler, and then I used a spoon to take the chocolate and put into the silicone mold. I then put it in the fridge to set. Some tips for if you want to mold chocolate use some parchment paper on the top of the mold to keep it flat.

Hope you liked this blogpost please like/follow our blog.

--Sam Schickler